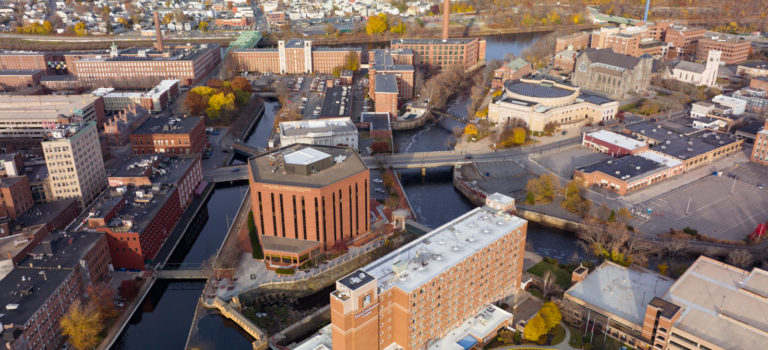
October 2024, while I was awaiting the next generation professional camera drone in the Mavic series, DJI instead released the Air 3S, which is considered a “travel drone” because of its size and excellent portability. The long-anticipated Mavic 4 pro is now expected to be released in April 2025. We know that the Mavic 4 is imminent because DJI submitted the product plan with the FCC. And currently, DJI has offered sale pricing for Mavic 3, which likely indicates DJI wants to reduce inventory of the old Mavic in advance of releasing the new Mavic 4.
Rumored features of DJI Mavic 4 pro
Three cameras (similar to Mavic 3 pro)
100-megapixel camera resolution
Video resolution up to 6K @ 60fps
Built-in ND filters
Obstacle avoidance includes LiDAR
6645 mAh battery
Up to 50-minutes of flight on a single battery
Approximate weight 2.3 lbs (a few ounces more than Mavic 3 pro)
Personally, any aerial drone is a flying camera; I’m always hoping for a better camera. However, I do not currently have a need for 6K video resolution. Beyond that, there are a few features here that would immediately render the Mavic 4 pro as “best in class” aerial camera drone ….
Longer flight time is generally welcomed by everyone. The battery capacity is always an important factor in flight time. Because a larger-capacity battery is commonly a heavier battery, achieving longer flight times is a balancing act and more than a small feat.
Built-in ND filters would be very significant. Today, without this feature, we have to land an aerial drone to physically change the ND filter.
LiDAR is important for obstacle avoidance in low light. I’ve seen one report that LiDAR maybe was planned but subsequently cancelled for Mavic 4; which means nobody knows for certain. The Air 3S is DJI’s first drone to employ LiDAR (for forward-sensing only).
Do not confuse DJI Mavic 4 with DJI Matrice 4. Matrice 4 (released earlier this month) is an enterprise class drone that supports thermal imaging, optional spotlight, and can carry payloads up to 200 g.
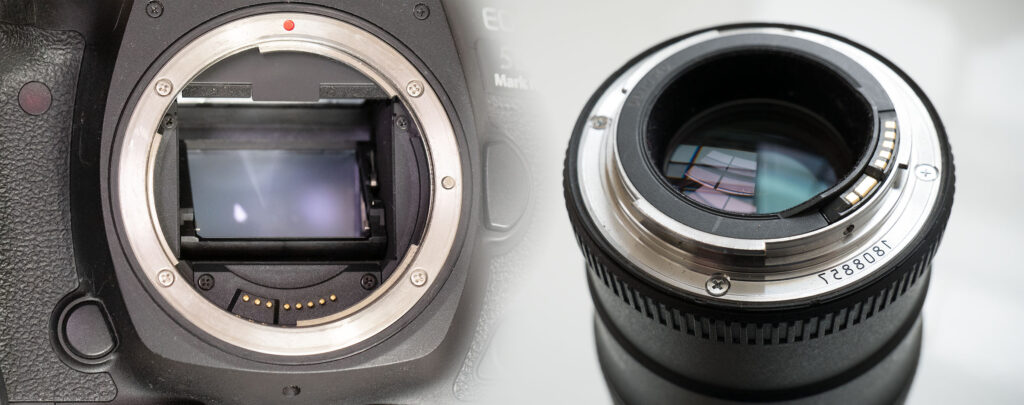
Canon EOS, EOS M, and EOS R are all interchangeable-lens systems. In some cases, an adapter can be used to put a lens from one EOS system onto a camera body of a different EOS system. In other cases you cannot; the physical characteristics make it impossible.
(1987 – 2004) Canon EOS cameras were SLR film cameras and then DSLR digital cameras; unlike previous camera systems, the EF lens mount is completely electronic. (2012 – 2019) Canon EOS M cameras have EF-M lens mount. (2018 – ) Canon EOS R cameras have RF lens mount.
* Original Canon EOS camera bodies are either 35mm SLR or DSLR with image sensors up to Full-frame (same size as 35mm). EOS camera bodies employ EF lens mount but the lenses have two variations, EF and EF-S. EF lenses are compatible with full-frame/35mm image sensors, while the EF-S lenes are limited to smaller APS-C (crop sensor). EF-S lenses tend to be physically smaller than their EF counterparts.
* Canon EOS M cameras are all mirrorless and support image sensors up to APS-C.
* Canon EOS R cameras are all mirrorless and support image sensors up to Full-frame.
In general, lenses designed for APS-C (EF-S lenses or M lenses) cannot be used on Full-frame cameras. Possibly you might fit an EF-S lens onto an EF camera body, but potentially the reflex mirror inside the camera could physically hit the back of the lens. If that doesn’t happen, you will likely encounter one or two problems. Sharp focus may not be impossible because the distance between the lens and image sensor is incorrect. At wide apertures, the corners of the image may be dark because the lens is designed for a smaller image sensor.
In general, lenses for mirrorless cameras cannot be used on DSLR camera bodies. This is because the distance between the lens flange and the image sensor is shorter and there is no room for the mirror inherent in DSLR cameras.
EF lenses can be used on most any camera body. perhaps with help of an adapter. EF-S may or may not fit onto an EF camera body, but don’t try it. EF-S lenses can be used on APS-C camera bodies, including EF-M and RF with help of an adapter.
EF-M and EF-R lenses cannot be used on camera bodies with EF mount (regardless of the image sensor size) EF-M lenses can only be used on M-series camera bodies. Technically, an M lens could work on an EOS R-series camera, but no such adapter exists. (As Canon never made many lenses for the M system, likely no adapter will ever exist.) RF lenses can only be used on R-series camera bodies. (Considering the possibility of an adapter to put an RF lens on an M-series camera body, it seems not possible because the physical diameter of the RF lens mount is larger than EF-M.)
ISO is a property of recording photography; it represents sensitivity to capture light. Before the days of digital cameras, all photographic film was categorized with an ISO rating. Digital cameras have an adjustable ISO. Increasing digital ISO is primarily a matter of increasing the gain of the electronics signal. As with most electronics, gain increases not just the signal but also signal noise (stuff you don’t want). However, many digital cameras today have excellent signal-to-noise ratio.
In the days of film cameras, photographers might “push process” film to achieve higher ISO. ISO 400 was commonly pushed to ISO 800; that’s a difference of 1 f-stop.
Today, using digital cameras, 1-stop is child’s play. Digital cameras can provide 6 f-stops or more …. ISO 51,200 or better. The results can be cleaner (less noise) than the old ISO 400 film pushed to 800.
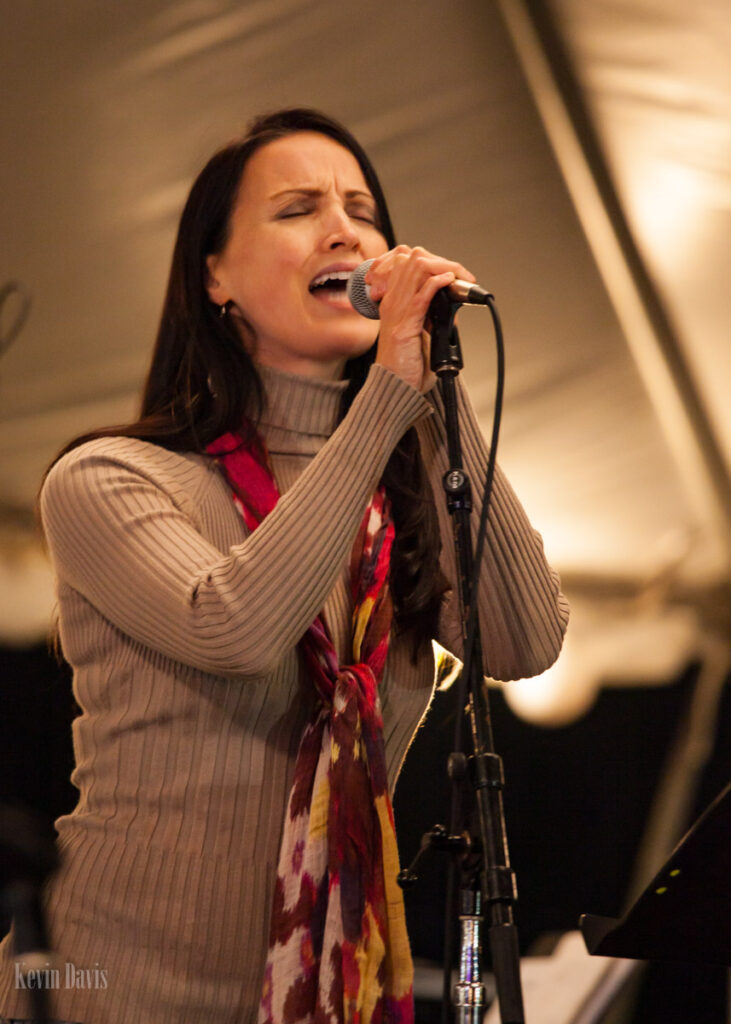
I shot the image here at ISO 5000 … that was ten years ago.
(Intonition Band, at night under a tent at Fraklin County Fair)
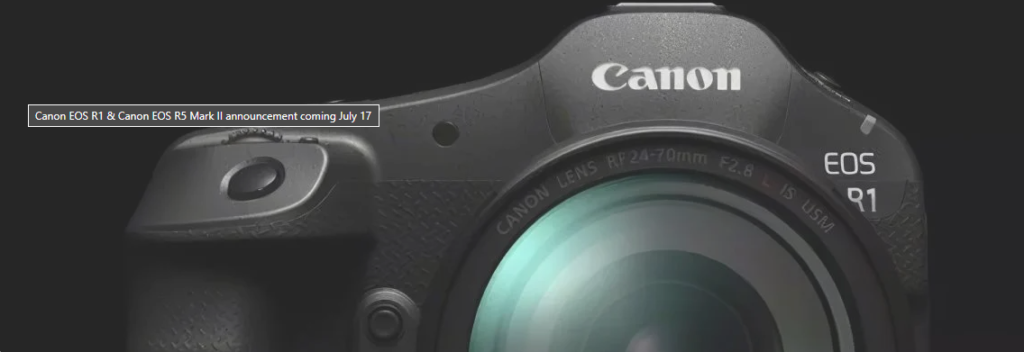
Two new Canon camera bodies have been long rumored to be released soon. For several months, rumors have further suggested the release announcement will coincide with the Summer Olympics 2024. I can only guess this is because some photographers will be shooting the new camera – or cameras – at the Olympics.
Latest rumor suggests Canon will announce one or both cameras on July 17.
The name designation “1” indicates a flagship camera, the best Canon has to offer. That’s the EOS R1.
The EOS R5 mark II is an expected refresh of the very popular EOS R5 that was released four years ago.
Fifteen years ago, this question was very significant (for most cameras) as an indication of wear and remaining functional life. If you were to purchase a used camera, you would certainly want to know the answer to this question. Today, this is not as true as it used to be.
Mechanical/moving parts are subject to some degree of wear. Metal parts suffer from friction. Plastic parts may become brittle. They eventually wear out. Get maintenance or get rid of it. But many of today’s digital cameras don’t have moving parts and do not suffer the same effects of wear. They have electronic sensors and electronic shutters.
Cameras have commonly remembered how many times the shutter has been actuated (how many photos have been captured). Through various means, you may be able to retrieve that information from a camera. In many digital cameras today, shutter count information may not be available at all. Furthermore, digital cameras are often used to capture video (rather than still photos) and the shutter count isn’t useful information.
That being said, I recently decided to sell a DSLR from 2015. Any DSLR certainly has mechanical parts and the shutter typically has an expected lifespan. As I had used this camera for still photography (not video), the shutter count is useful information. But retrieving this information from the camera proved a bit difficult. Here are several methods that generally might succeed, but in the case of my camera, I found that only one of these methods succeeded.
If you have software that shows EXIF information within an image, every digital photo may include the shutter count. Didn’t work. While all digital cameras report EXIF, not all cameras include shutter count in that data. (Online comment: “Last camera from Canon with shutter count in EXIF was EOS 1D II N.”)
Some websites: you upload an image from your camera and it will read shutter count from the EXIF information Didn’t work. See explanation above.
FreeShutterCount (freeware) Requires installing some 3-rd party USB drivers … no thanks (I’m not going to risk installing some unverified USB drivers on my computer.)
EOSinfo (freeware) Doesn’t work with my camera model.
EOS Digital Info (freeware) Doesn’t work with my camera model.
DIRE Studio Shutter Count (freeware) Apple/Mac only; I don’t have any Apple/Mac devices.
Tornado EOS Multiple people have reported this software contains malware.
An online search for “expected shutter lifetime Canon EOS cameras” tells me that this camera model should happily provlde 200,000 shutter actuations without any problems. My camera has 30,000 shutter actuations.
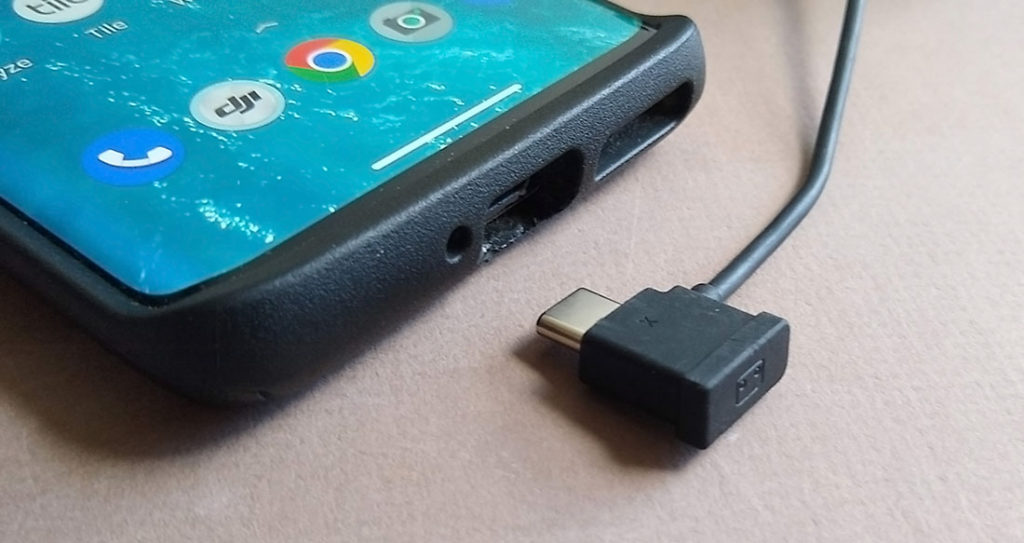
The standard hand-held remote controller for several DJI aerial camera drones is RC-N1. (These drones include DJI Mini 2, Mini 3, Mavic 3, Mavic Air 2 and 2S.) While this controller includes a small USB cable that hides when not in use, the cable commonly cannot be attached to a smartphone if that phone has a protective case. It fits any phone with a USB-C port but not if there is a protective case on the phone.
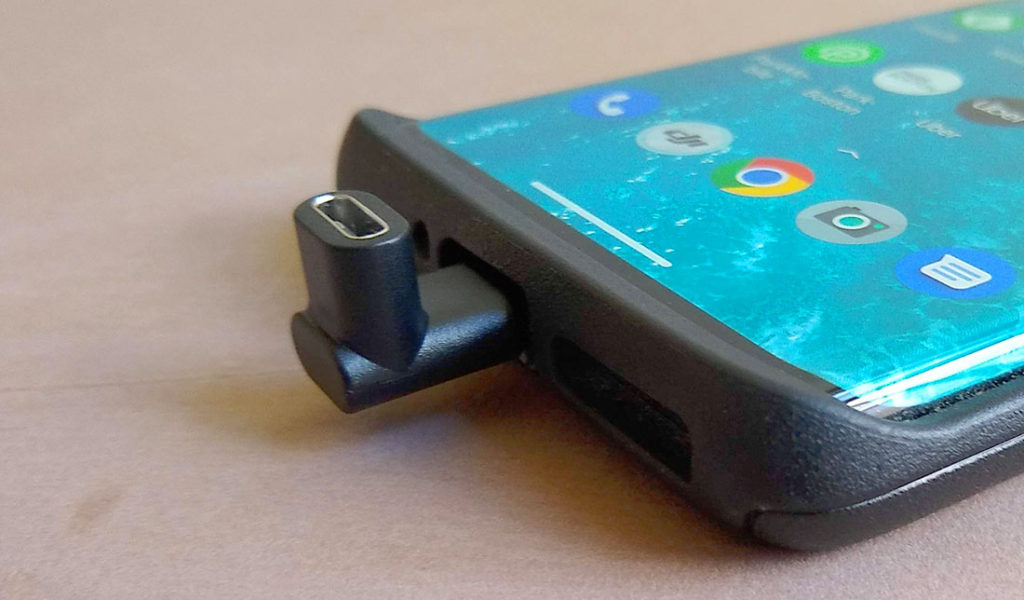
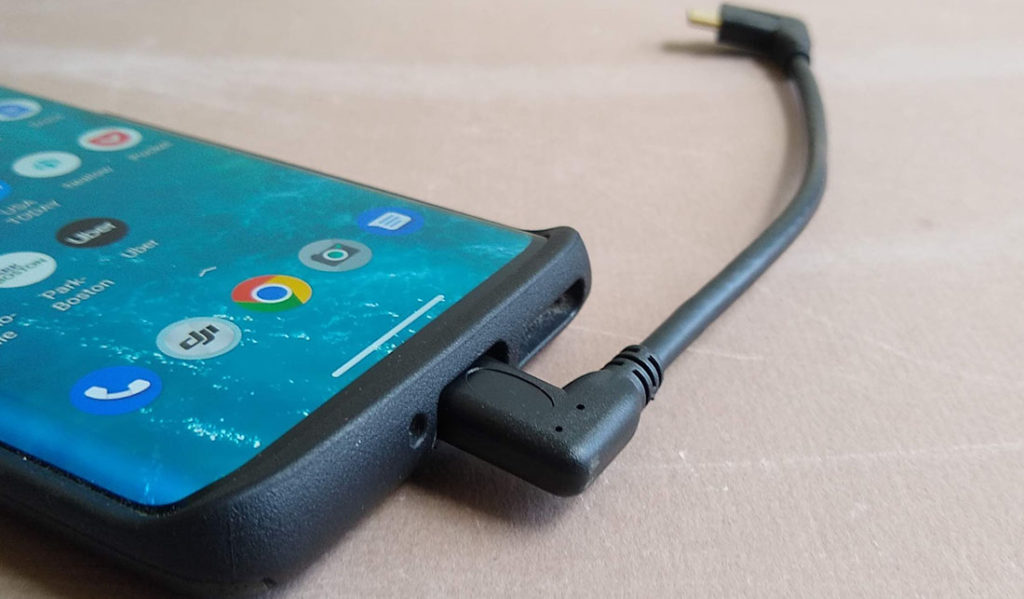
Here are two products that solve that problem. One is an adapter and the other is a replacement cable.
I keep the adapter in my drone carry bag for when I might need it. As it is quick and easy to attach, there is no need to leave it attached at all times.
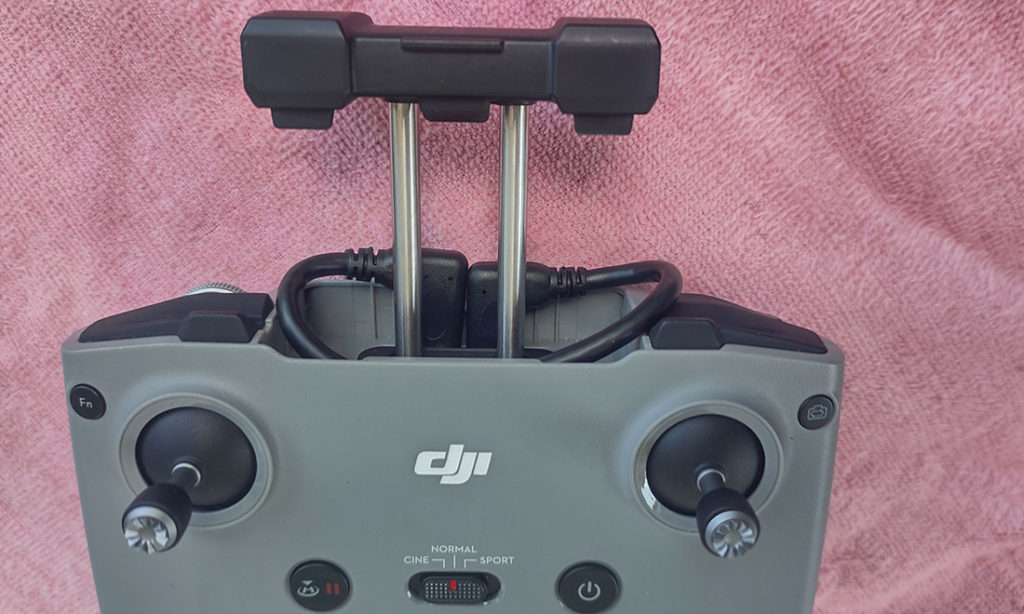
The replacement cable is a bit thicker and bulkier than the standard DJI cable; it does not store nicely in the folded controller; see the photo here. You can decide for yourself if this is acceptable.
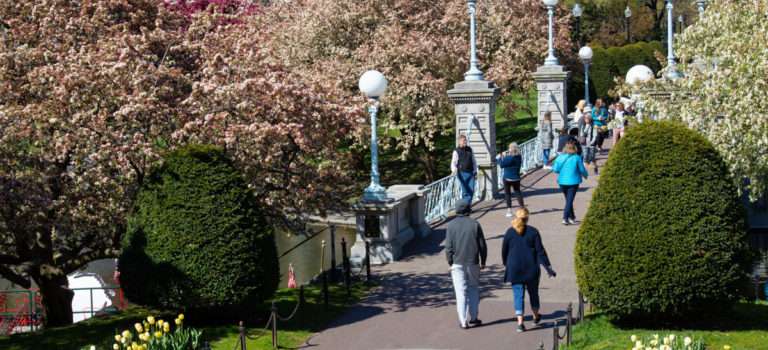
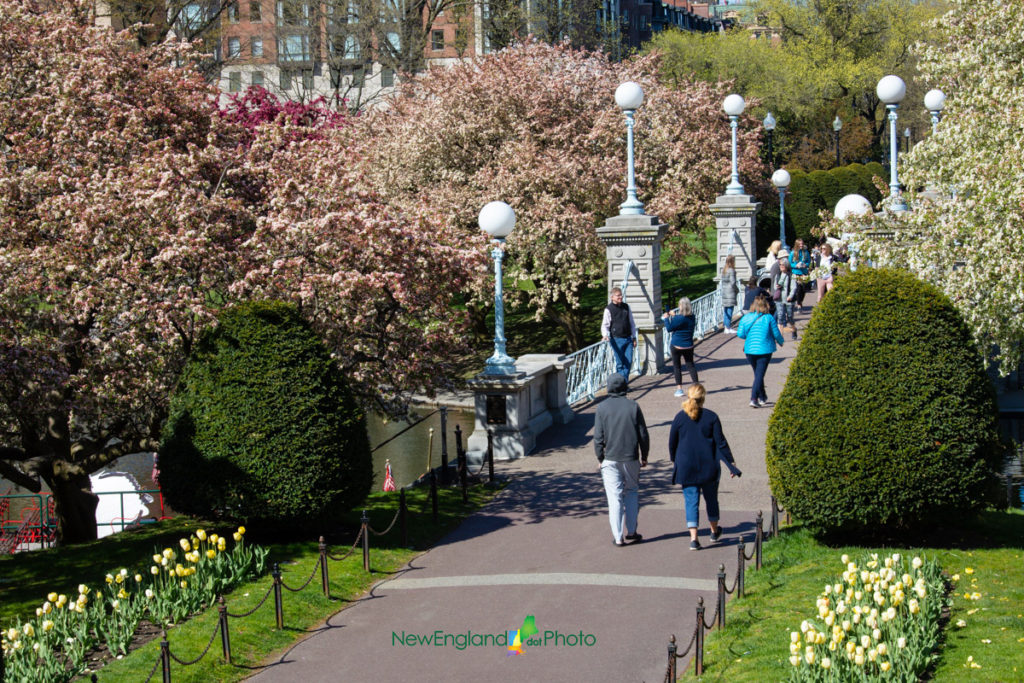
This photo was carefully planned, for the time of year (trees are in bloom), the location, and a somewhat unusual downward angle. The human experience here (Boston Public Garden) includes sky and nearby skyscrapers. I chose to eliminate the sky and skyscrapers through use of a high camera position looking down. However, elevating the camera can be a difficult problem if there is nothing to stand upon.
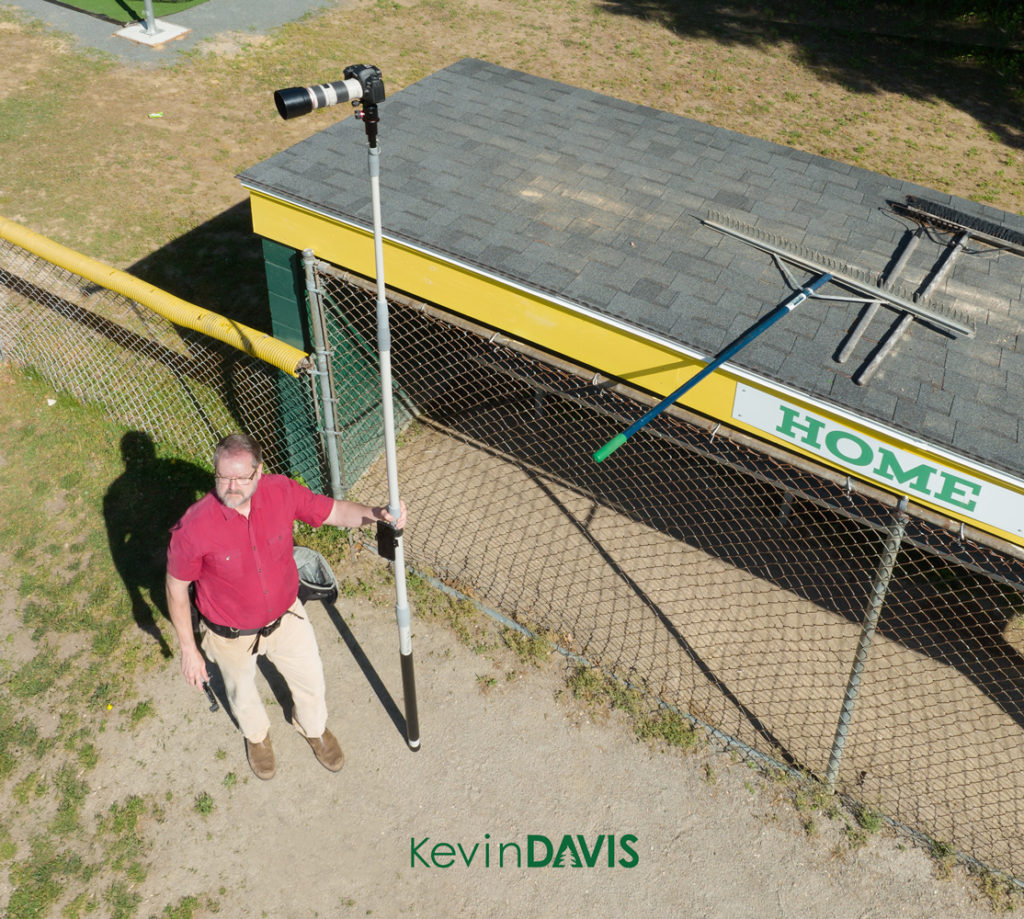
One of my favorite photographic tools is a telescoping pole with a camera mount at the top. Combined with a camera equipped with wi-fi, the camera can be raised up to 20 feet and operated from a mobile app on a smartphone.
A telescoping pole is often the best choice for a camera height of ten to twenty feet. To photograph from a height of forty feet or two hundred feet, I can use a small aerial drone. While a drone can be used at altitudes of fifteen or twenty feet, that could readily be a distraction and a nuisance to people who are trying to enjoy the park.
On multiple occasions my photographic intentions have been thwarted by the presence of utility wires strung upon poles. While I could have flown an aerial drone above the wires, I instead chose to use a telescopic pole and place the camera twelve to eighteen inches below the wires. Personally, I don’t want to fly a drone that close to wires. Unlike a drone camera, a pole-mounted camera can’t move suddenly and potentially collide with wires.
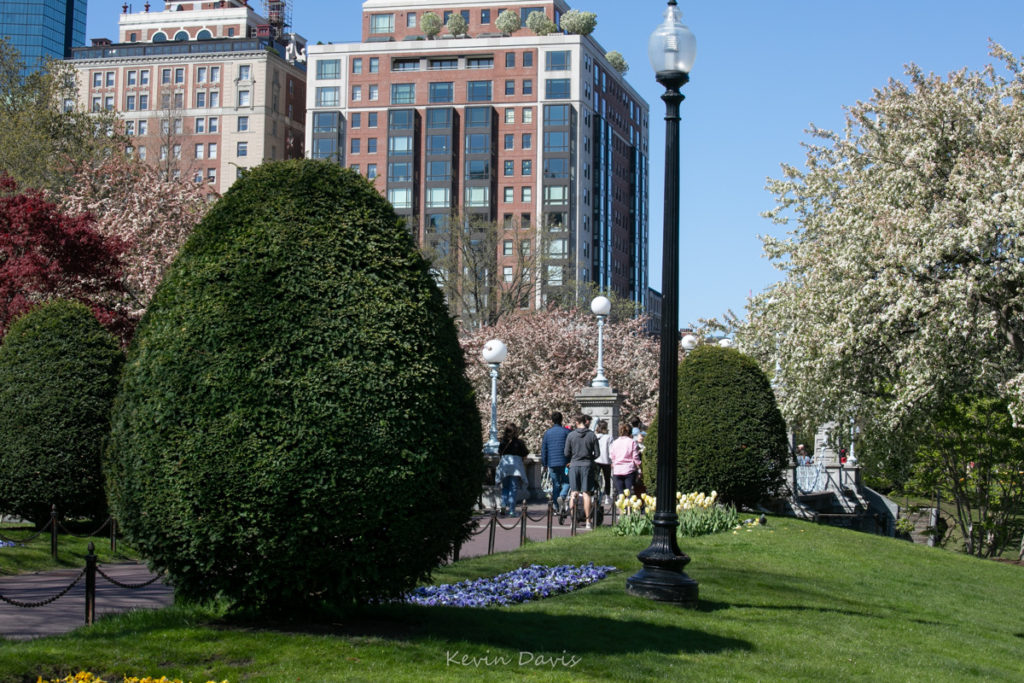
For comparison’s sake, I shot the same scene with the camera at eye-level. The location I chose for my photo was occupied by a nine-foot-tall shrub. The pole-mounted camera enabled shooting over the top of this shrub in the foreground.
Although the Mavic 3 includes some groundbreaking new features, many reviewers will render their opinions about such things and I will not do so here. I am only analyzing the photo quality from Mavic 3 with comparison to the predecessor Mavic 2 Pro.
Mavic 3 includes two cameras. I am comparing the main camera to the camera of Mavic 2 Pro. The Mavic 3 main camera has a fixed-focal-length lens, 4/3 image sensor, and variable aperture.
The Mavic 3 supports capturing photos in either JPEG format or JPEG & RAW. While I almost always capture photos in RAW format and I do not need a JPEG, the initial release of MAVIC 3 will always save a JPEG. That could possibly change in a future firmware update.
See the end of this post for a link to my 2018 comparison of Mavic 2 Pro image quality, compared to original Mavic Pro.
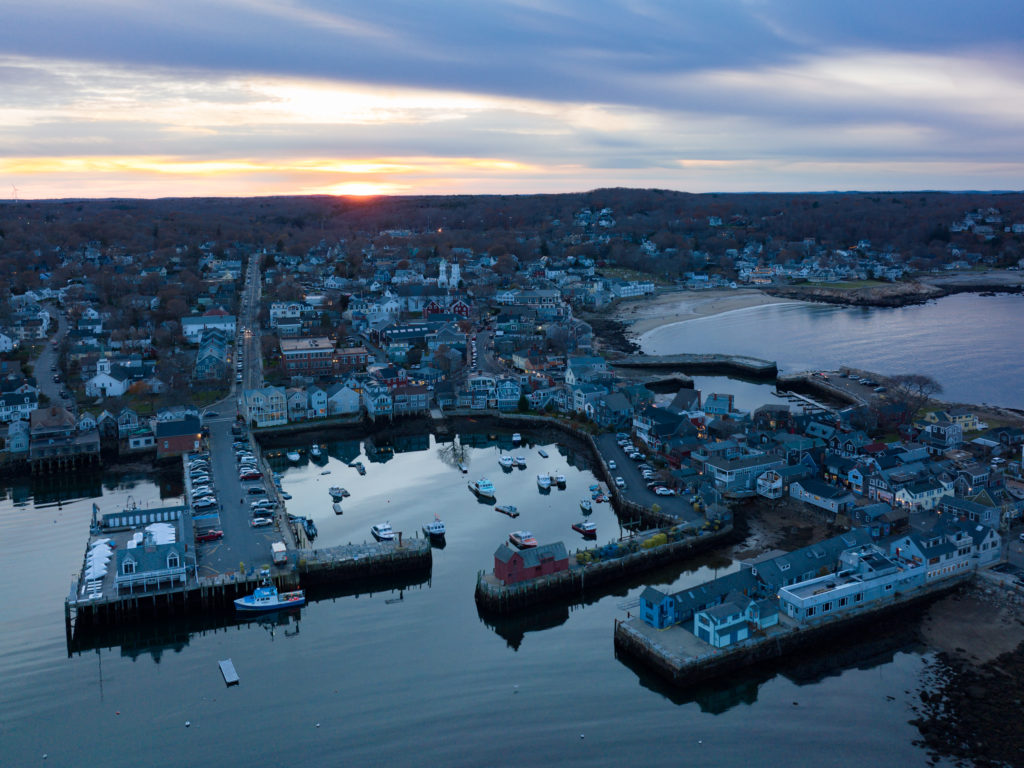
Testing the Mavic 3 at sunset … f\3.2, ISO 100
The main camera of Mavic 3 uses a 4/3 image sensor; this has implications.
The image rectangle has an aspect ratio of 4:3, which is same as Mavic 2 Zoom but is different than Mavic 2 Pro and Mavic Air. For me personally, this implies that I must crop each image and discard some pixels to obtain a final image of 3:2 aspect ratio.
Four-thirds and Micro Four Thirds (MFT) are established standards. The diagonal measure of a 4/3 sensor can vary but is typically around 22mm. Compare this to Mavic 2 Pro and Mavic Air 2S, which each have image sensors with diagonal measure around 16 mm.
A larger sensor can allow for either more pixels or larger pixels. The Mavic 3 pixel resolution is not significantly different than Mavic 2 Pro. Likely the individual dot elements (pixels) are larger. Potentially that might translate to better ability to gather light, potentially reducing the signal-to-noise ratio. But that is theoretical. As the old saying goes, the proof is in the pudding.
Some online articles suggest that the larger image sensor “gives Mavic 3 higher resolution and dynamic range” but …. higher resolution is a dubious claim and higher dynamic range is theoretical.
DJI drones have historically employed Sony Exmore image sensors; DJI/Hasselblad cameras are no exception. I must guess that the Mavic 3 is using the Sony IMX472-AAJK, but I have not confirmed this. That sensor can capture all 20 megapixels at 120 frames-per-second. Notably, this sensor uses “stacked CMOS” technology and is the first ever stacked CMOS sensor in the 4/3 size. This sensor diagonally measures 21.77 mm.
The Mavic 3 user guide (available online) includes this disturbing note: “Before shooting important photos or videos, shoot a few images to test the camera is operating correctly.” I shudder to imagine what might have happened during initial product testing to warrant such a warning.
Pixel Resolution
If you want a final image to have3:2 aspect ratio, then any 3:4 image must be cropped and that includes Mavic 3. Technically, you end up with fewer pixels than Mavic 2 Pro and Mavic Air 2S.
Mavic Air 2S @ 3:2 aspect ……………… 5472×3648 = 19.9 million pixels Mavic 2 @ 3:2 aspect ……………………… 5464×3640 = 19.88 million pixels Mavic 2 @ 4:3 aspect (crop from 3:2)… 4852×3640 Mavic 2 @ 16:9 aspect (crop)…………… 5464×3070 Mavic 3 @ 4:3 aspect …………………….. 5280×3956 = 20.88 million pixels Mavic 3 @ 3:2 aspect (crop from 4:3)… 5280×3520 = 18.58 million pixels Mavic 3 @ 16:9 aspect (crop)…………….. 5280×2970
Color
Opening RAW images in Adobe lightroom, the color is a bit green. That’s correctable but really annoying; I’m guessing this problem is because Lightroom/Photoshop/CameraRAW do not yet include a camera profile for Mavic 3 (Hasselblad L2D-20c).
Looking at the JPEGs, the color looks good – not vibrant, but good.
Sharpness
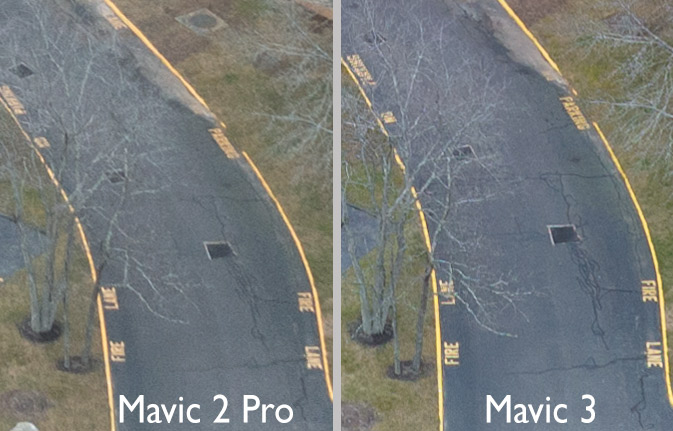
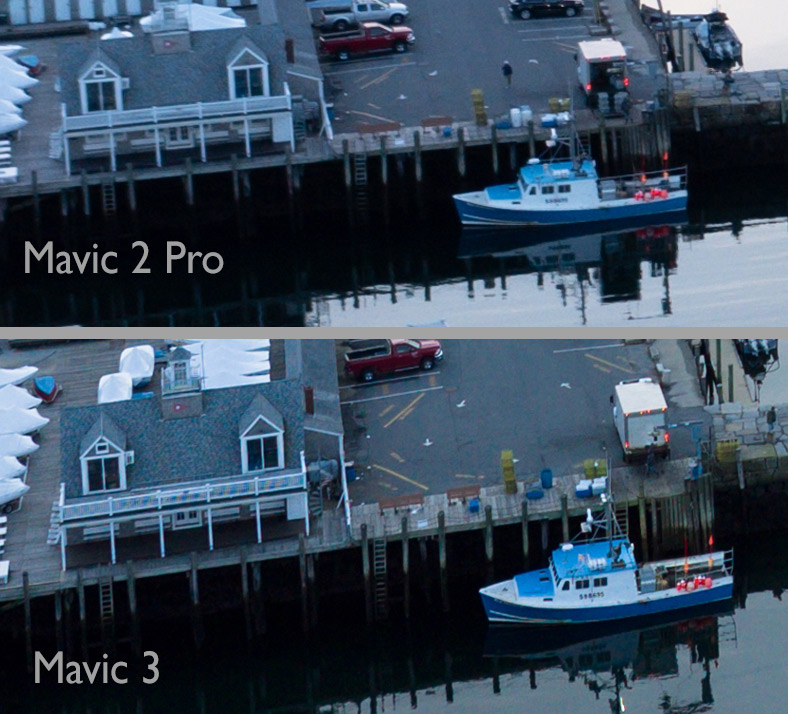
Comparing images from Mavic 3 and Mavic 2 Pro, at aperture f\3.5 and f\4.0, the two are equally sharp at center of the lens. However, away from center, toward the edges of the image, Mavic 3 exhibits improved sharpness over Mavic 2 Pro.
High-magnification crop from the original RAW image
Image noise
Considering all ISO 100 through 3200, Mavic 3 shows less luminance noise than Mavic 2 Pro. However, at any ISO, low light situations can result in considerable chroma noise in both shadows and midtones. It is worst at IS0 800, 1600, 3200. While it can usually be mitigated using noise-reduction in post-processing, the 4/3 image sensor should not exhibit this problem.
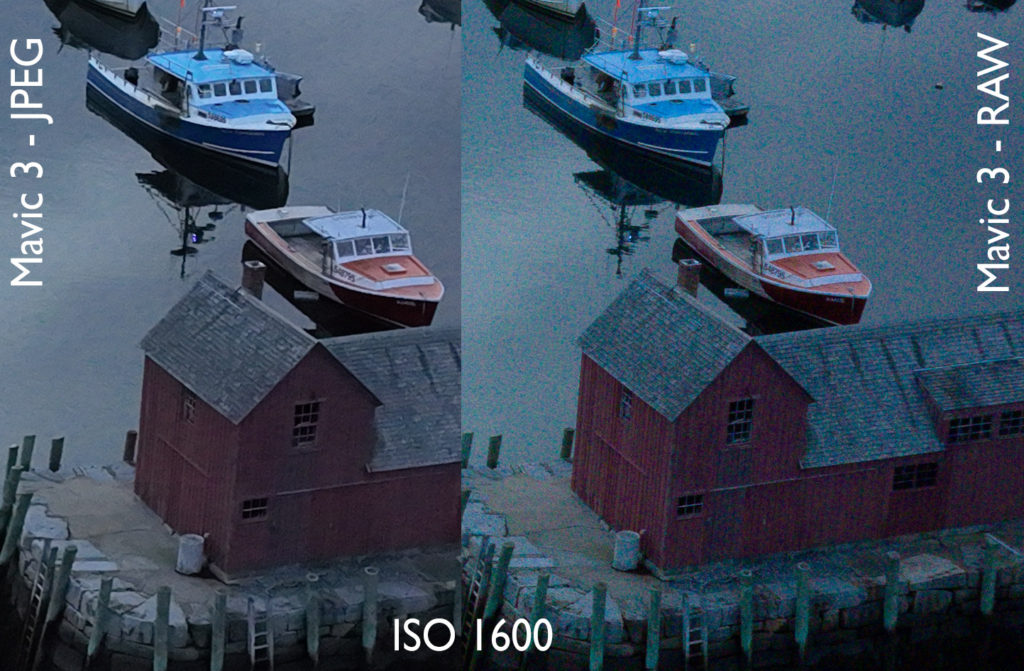
As the camera saves both RAW and JPEG, I looked at the JPEGs. Luminance noise is reasonably mitigated through ISO 1600; mitigation can be dicey at 3200. Chroma noise is essentially eliminated. However, not surprising, this noise reduction comes at a price – loss of sharpness.
Luminance noise in shadows … ISO 400, daylight with ND4 filter … N0te: ambient light and altitude are not identicalMavic 3 … chroma noise in low light … ISO 1600
Chromatic aberration
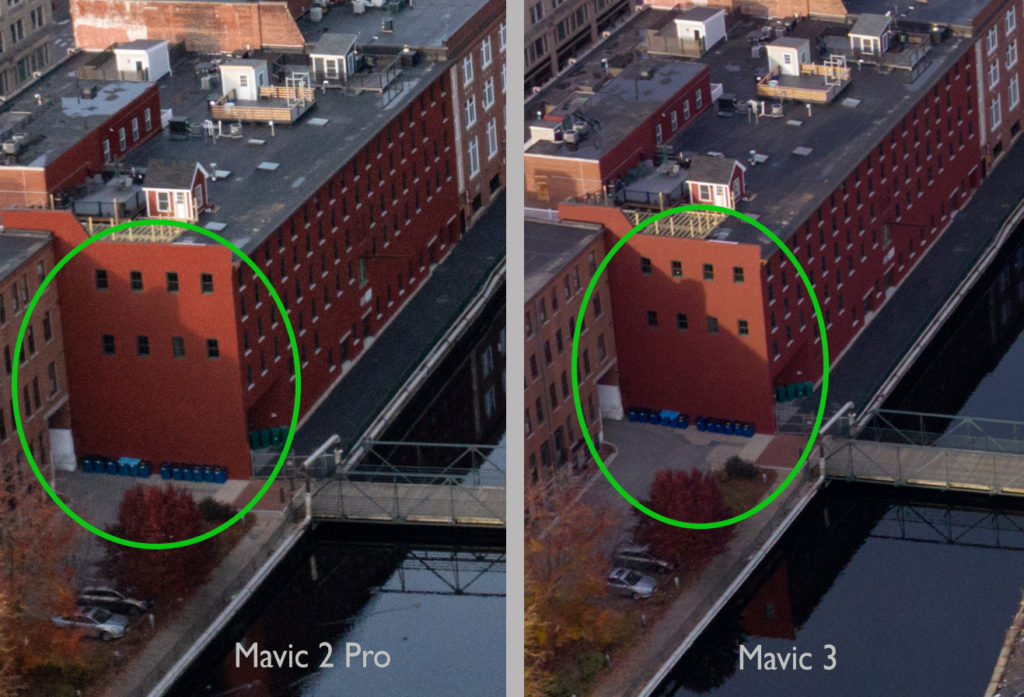
In some situations with high-contrast fine detail, Mavic 3 can suffer from chromatic aberration similar to the first-generation Mavic Pro. Although Mavic 2 Pro significantly reduced chromatic aberration, Mavic 3 is a step backward. This is observed with the clear DJI lens cover; I haven’t tried it yet with the naked lens.
Mavic 3 (RAW image) shows improved sharpness, but also shows chromatic aberration in railing balusters
Shadow detail
Considering detail in the darkest shadow areas, Mavic 3 has a slight advantage to reveal details that Mavic 2 Pro cannot. The difference is quite small.
DJI has stated that the Mavic 3 main camera has 12.8 stops of dynamic range, which is not significantly greater than Mavic Air 2S or Mavic 2 Pro.
Highlight detail
Both the original Mavic Pro and the successor Mavic 2 Pro often failed to resolve subtle detail in highlights. This commonly manifests in architectural details that are white,such as clapboard siding and trim mouldings. Mavic 3 does shows a slight improvement.
Images captured with Mavic 2 Pro – particularly images that include architecture – have commonly required a great deal of effort to safeguard highlight details. At the time of capture, exposure bracketing saves an additional exposure wherein the highlights are rendered with reduced brightness. In post-processing, that exposure is developed carefully and specifically for hightlight details. Then those highlights are manually blended into the other exposure. Only time will tell if Mavic 3 eliminates the need for that extra work.
Remote control
Apart from the camera itself, I must mention the remote control. With the Mavic 2 Pro, I have very commonly used the camera control dial under the right index finger. With Mavic 3, the RC-N1 remote controller has no such control dial; exposure settings can only be controlled via touch-screen. The expensive RC Pro controller includes a dial for right index finger, which I vaguely believe controls camera zoom and I do not know if it can be used for exposure purposes. I did not spend the extra $1000 to get an RC Pro.
Mavic 3 … , daylight with ND4 filter, f\4.0, ISO 400
Here is my investigation of the Mavic 2 Pro, back when that was released in 2018:
On multiple occasions, my intended drone flight was defeated because my DJI drone refused to spin-up the propellers. Although the flight is authorized by the FAA, the drone refuses to launch. With proper planning, this problem is avoidable.
DJI drones include a safety feature known as Geofencing, which is intended to prevent flying in areas that are could be unsafe, particularly near airports. There are different systems of understanding the airspace and the DJI system is entirely different that the system employed by the FAA.
Local airport facility grid
Anywhere around controlled airspace, maximum flight altitude is determined a grid layered across a map; each grid-square indicates maximum altitude. As this is local to the facility/airport, it is commonly referred to as the facility grid.
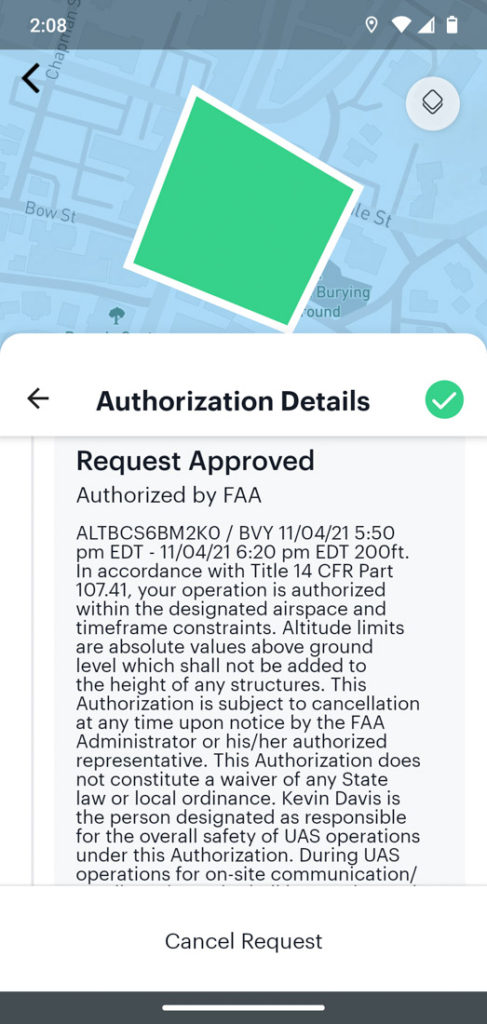
A flight plan that does not exceed the stated maximum altitude can often be approved in seconds by a computer, without need for review by a person. This is made possible by a computerize system called LAANC (low altitude authorization). Submit your flight plan via a mobile app that supports LAANC. If you succeed in receiving authorization, you may need to export that information and then submit it to DJI to unlock your drone.
For years, I used a LAANC-enabled app called AirMap. Recently, that failed (and I found some rumors online why that might be true). Ultimately, I was forced to switch to a different LAANC-enabled app and I now use Aloft (https://www.aloft.ai/), formerly known as Kittyhawk.
If your drone is locked and will not launch, flight authorization from the FAA – by itself – does not unlock a DJI drone.
DJI Geofencing
Based upon the current GPS location, the drone automatically is aware of local flight restrictions. Potentially, it can refuse to take off. In some cases you may be able to unlock it from your flight controller; this is called self-unlocking. In other cases, self-unlocking is not allowed and you must request unlocking DJI Fly Safe (https://www.dji.com/flysafe). FAA flight authorization is a prerequisite.
In advance of your flight, always check the DJI Fly-Safe geofencing map. If you’re flight is either fully or partly in a blue zone or red zone, you will need to manually unlock the drone. DJI GEO system shows approach paths to airport runways and it is these areas that are likely to be considered no-fly zones. DJI did not invent this system; it is based upon LATAS (Low Altitude Traffic and Airspace Safety), which I have read was pioneered by PrecisionHawk.
Do not wait until you arrive at your launch location before checking that your drone will be able to launch. Research in advance: weather, FAA controlled-airspace restrictions, NOTAMs, and DJI GEO restrictions.
In specific geographic locations, your drone controller may display “NFZ”, which means “No-fly Zone”. When locked due to a NFZ, the drone can only be unlocked via the DJI Flysafe website; it cannot be unlocked via self-unlocking.
(I remember a conversation with a police officer in Boston when he asked to check my flight authorization. When I told him the drone would not launch in a specific location, he suggested that the pilot can simply unlock it and I told him that is not always true. Clearly this guy does not have personal experience flying DJI drones within the class-B airspace of Boston Logan airport.)
On mobile devices (e.g. smartphone), the Fly-Safe website reports that unlocking is not supported on the mobile website. The solution is to use a full-screen computer. Do this at home before you drive off to your launch site.
For custom unlocking via the DJI Flysafe web page, you probably need a computer.
Upon submitting your request, two things happen. You will receive an email that states “Unlock application is created.” The web site shows you that the request is “Pending review.”
If all goes well, two things will happen. You will receive a subsequent email within less than 10 minutes stating “Unlock application is accepted.” The website shows you that the request is “Accepted.”
Your login username must match: Flysafe web site & the mobile app.
Import the unlock certificate to the aircraft
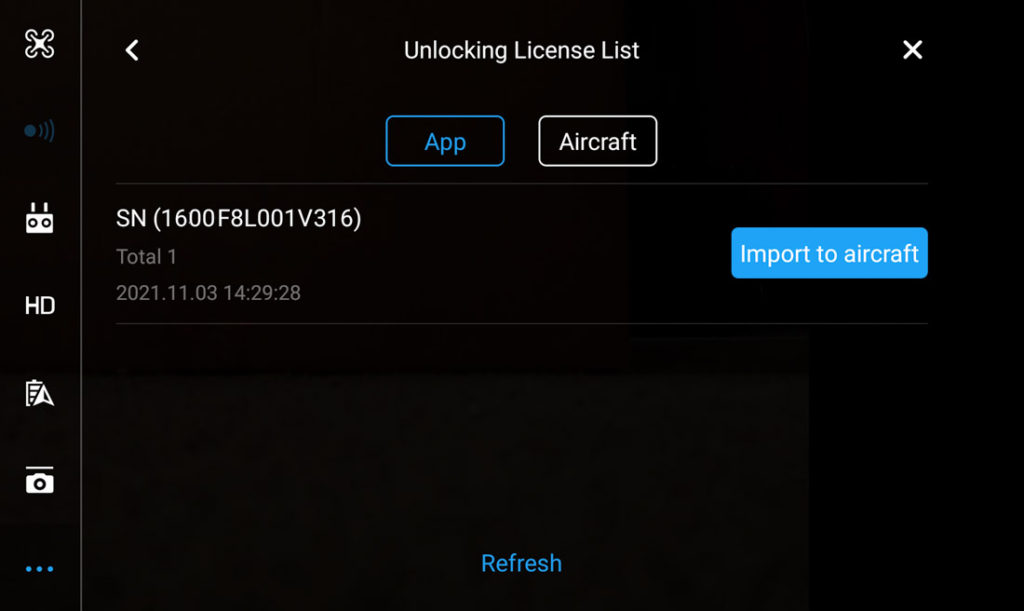
What happens next is not entirely obvious and requires a bit of care. You launch the app for piloting (e.g. DJI Go 4 or DJI Fly) and find the menu item “Unlocking License” (DJI Go 4 app) or “Unlock GEO Zone” (DJI Fly app). The app retrieves any unlocking authorizations via the Internet. This requires two things. You must be connected to Internet data (e.g. Wi-Fi or cellular data network). Whenever you launch the app, you must be logged-in and the username must match the username that you used when requesting the unlock. (I have once stumbled because I had inadvertently used a different login, the unlocking license could not be found, and my intended flight did not happen until after I solved the mystery.)
If all goes well, your unlocking authorization will be listed. You’re not quite done yet; there are two more steps to unlock the drone. Though the license is recognized by the remote controls, the license must be copied to the drone. Look for “Import to Aircraft”. Do that and the app will then show that the drone has the license and it appears with a on-screen enable/disable switch. As the default is “disabled”, you must slide it to “enable” before the drone will finally unlock the NFZ. The display on remote controller will change from “NFZ” to “Ready”.
NOTAMs (Notice to AirMen)
Mobile apps that support LAANC will show you both the boundaries of controlled airspace (class-B, class-C, class-D, class-E ground level) and all local facility grids. However, most of these apps do not show active NOTAMs. To see active NOTAMs, simply look at Skyvector.com. Active NOTAMs appear as red circles.
To stabilize a camera for video filming, we have seen several types of stabilization: (1) Large Steadycam body-mounted on a vest. (This was invented around 1975.) (2) Hand-held stabilizers that rely upon counter-balance weight (3) Computerized gimbal operated with two hands and support cinema cameras such as RED, Sony, Canon, etc (4) Computerized gimbal that can be held with just one hand and support smaller cameras (5) Very small devices including camera and gimbal with a total weight of 16 oz or less. (6) In-camera mechanical techniques for stabilzation, either lens-shift or sensor shift (7) Digital image stabilization
Computerized gimbals have been a game changer, invented around 2012. The larger 2-handed category has been dominated by Freefly MoVI series and DJI Ronin series of products. These systems do not include camera, video monitoring, or follow-focus.
Today, DJI introduced another game-changer – the new DJI Ronin 4D. This is no longer just a stabilization device, rather it is a complete system, including the camera. Surely many film-makers will not readily abandon their trusted cameras and lenses, but at first glance, Ronin 4D does seem to be a game-changer.
Cost: The complete system is less than $10K. Compare this to assembling a comparable system from separate components. Either a RED Komodo or Canon C300 Mark III will set you back more than $8K and that does not even include any lens. The built-in ND filters is a pretty big deal; can potentially eliminate need for a bulky matte box. The LIDAR system looks truly amazing.
The Ronin 4D Cinematic Imaging System includes:
Cinema camera: 6K @ 120 FPS, or 8K @ 75 fps, or
10-bit Pro-Res
Six built-in ND filters
Computerized 6-Axis stabilization gimbal
7″ touchscreen video monitor, detachable and wireless
LIDAR focusing system
long-range wireless 1080 video transmit (with encryption and frequency hopping)