Photographing Freestyle Ski Jumping

Very excited to photograph freestyle ski jumping this week!
For photography, winter can be dull, particularly if there is no snow … the grey season, the season of sticks without leaves. But NOT this week. This is an international event sponsored by FIS, the international skiing authority. The ORDA has authorized official Press credentials, which allows me a bit more freedom of movement than regular spectators, to achieve shooting angles I need to create good images.

Because the freestyle ski jump competition is preceded by a mogul competition, I will arrive a day early in order to catch the mogul competition.  Although I don’t “need” this shoot, I’m going to be right there and it could be fun (I simply haven’t thought about it much).  One extra night’s lodging is all it takes … and maybe rent a pair of skis so I can reach the top & middle of the slope.

Logistical arrangements have required a significant investment of time.

  • Lens selection & rent
  • A  couple of (smaller) equipment purchases
  • Contact ORDA for official Press credentials
  • Find a place to stay (difficult because I made a reservation only 1wk prior to the event)
  • Couple minor things regarding my car (before driving 500 miles)

(The weather forecast for Friday is *COLD*.)

I have selected a 70-200mm f4 zoom lens and the Canon EF 400mm f4 DO lens.  Having never used the DO lens before, this is a bit of a gamble.  However, at 4.27 lbs, the DO is significantly less weight than the 400mm f2.8 or even the 300mm f2.8.

While the weight of the 400mm DO is hand-holdable, I want a monopod so that I do not have to hand-hold it. But my cheap old monopod (really cheap) is not enough for this task.  So I purchased a new monopod (Feisol).  With this particular item in mind, I went to my local photography shop (Hunt’s Photo & Video) and looked at the other options (Benro, Induro, etc).  Lucky for me they did stock the Feisol and that is ultimately the item I had in-hand when I left the store.

When used on snow, a monopod (or even a tripod) will punch a narrow hole in the snow and sink, because of the very narrow footprint. A few monopods do have an expanded “foot”, but the model I selected does not have this feature. So I cut up the plastic lid to a peanut butter jar and attached that to the bottom of the monopod.
Motion Blur Sports Photography

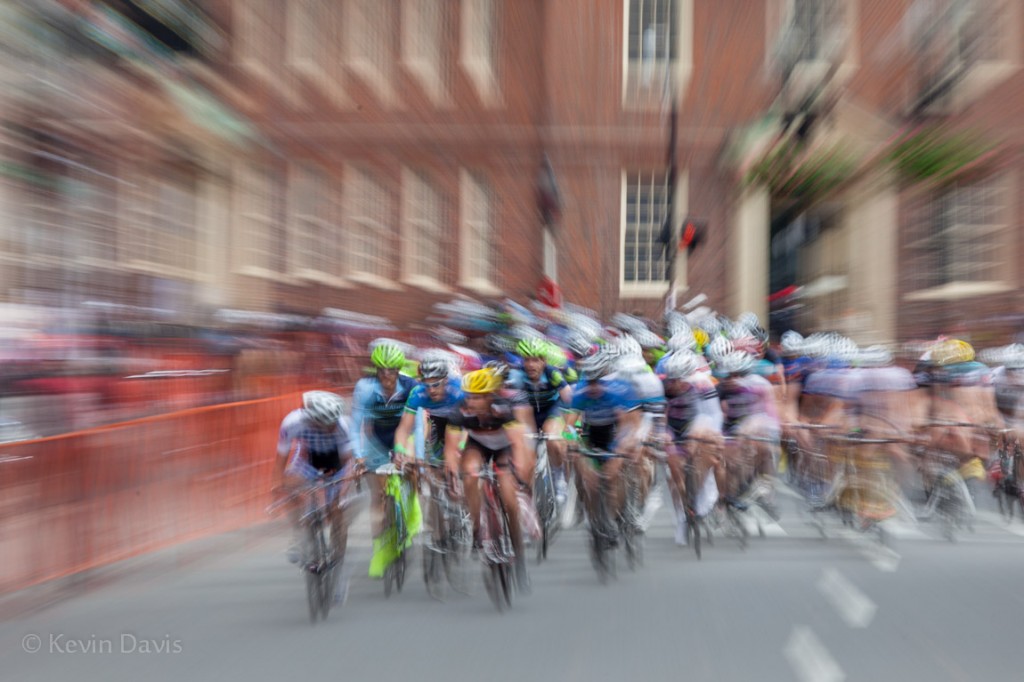
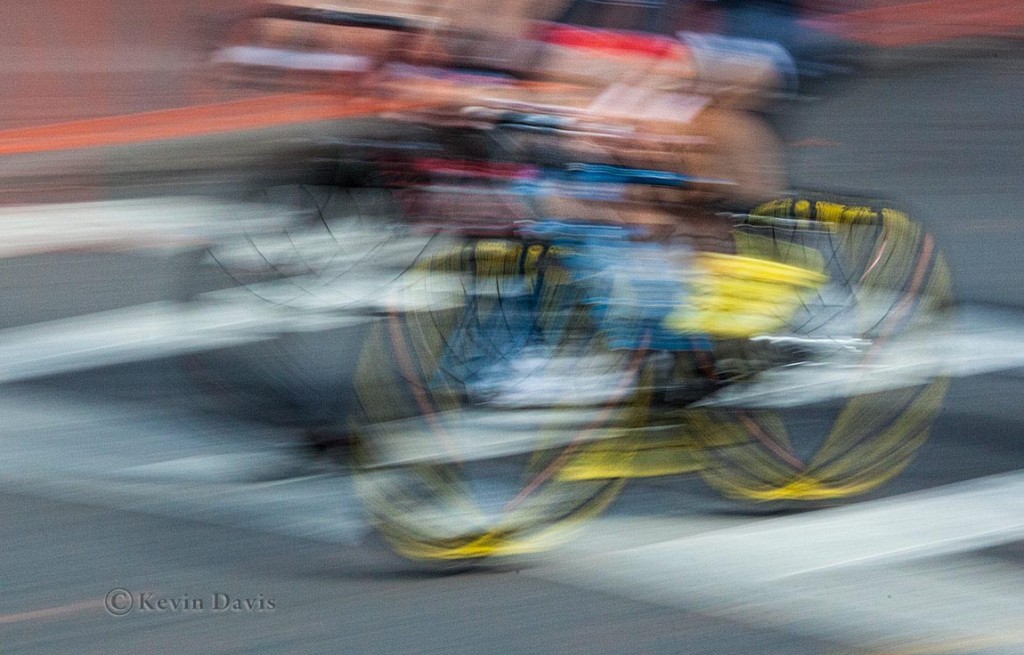
Most sports photography employs fast shutter speeds, to freeze the action.  But where there is motion, I want to show that.  A slow shutter speed allows movement to blur.  Here are a couple examples from a bicycle race last weekend in Boston.

(click on either image for a larger view)

While it is tempting to quote specific shutter speeds that I use, it really doesn’t work that way.  The shutter speed depends upon (1) the speed of the moving subject, (2) the angle at which the subject is approaching, and (3) how much blur I want.  So I might start out somewhere between 1/30 to 1/100 second and then chimp the back of the camera to see what it looks like.

(Chimping means frequently reviewing captured images on the camera display panel. If it looks really good, you scream like a chimp.)

To get basic motion blur, you lock down the camera such that the background is sharp and the moving subject shows blur.  Alternativley, you can pan the camera to follow the the subject, such that the subject does not blur but the background does. Another technique is to actively zoom the lens during the exposure, which you see in the first image here, using a shutter speed of 1/4 second.  A shutter speed of 1/4 is quite long, but the subject here is moving head-on towards me.  Compare that to the second image, the subject is moving side-to-side perpendicular to the camera and the shutter speed is 1/30 second.

The blur effects shown here is achieved entirely in the camera.  As the subject does not stay in one spot, the light reflecting off the subject is diminished.  In post-processing (e.g. Photoshop or Lightroom), it is typically necessary to selectively restore brightness, contrast, and color saturation.  In the second image here, I have intentionally over-stated the contrast and color saturation.

With a bit of experimenting, you can get some interesting abstract results.  Motion blur photography is not new, but it is a bit unusual.  It has been said, if you want to excel, if you want to stand out in a crowd of talented people, don’t simply mimic what everyone else is doing.


Ultimate Lens for Sports & Wildlife

There are telephoto lenses and there are telephoto zoom lenses.
Then there are tele-extenders which increase the magification of a lens.
And … then there is this; three telephoto zooms in one lens.

However, it is still not available today, though originally planned for release in mid-2011.
Price tag (yet to be announced) may cause shock or heart arythmia.

http://www.the-digital-picture.com/Reviews/Canon-EF-200-400mm-f-4-L-IS-USM-Extender-1.4x-Lens-Review.aspx

http://cpn.canon-europe.com/content/news/telephoto_zoom_lens.do

latest update:  http://www.canonrumors.com/tag/200-400/


(I would like to include the photo from Canon, but their website states: protected by copyright, kindly do not copy.)

Equine photography

A fun and eye-opening day today photographing horses with Lisa Cueman and David Middleton. 

With a forecast for rain, we headed out to visit the horses early in the day.  (David’s wife, Claire, responded that sometimes in rare momemnts,  David does something smart.)

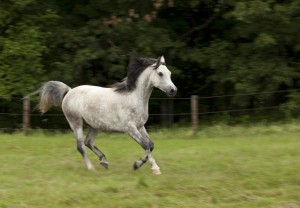
First, we had the opportunity to photograph the younger horse, Reva, running.  Being cooped up in the barn all morning, Reva welcomed the oppotunity to run around.  Then, after a expending some energy, was more accepting of standing around for some portraiture.

The technique of photographing a moving horse is theoretically similar to photographing a person running or riding a bicyle.  A perfectly sharp image requires a high shutter speed, but this is perhaps not the best idea because the photo fails to communicate motion.  Instead, we were shooting around 1/100 second and then following the horse’s movement by panning the camera.  With a bit of practice and a bit of luck, you can get a sharp image of the horse, but the feet show motion blur.

Simple right?  Well, maybe not.  In reality, an animal’s movements are unpredictable, making unexpected turns, stops, & starts.  So there is a bit of “spray and pray”.   Set the camera to take multiple photos in quick succession, press the shutter button for a few seconds, capturing numerous images, … and pray a few of them look good.   This is necessary particularly because the feet are constantly changing position and the most aesthetic position cannot be predicted.  Don’t think that it is simply dumb luck; it’s not.  As a photographer, you have to pay close attention to everything … but the position of the feet … that is mostly luck.

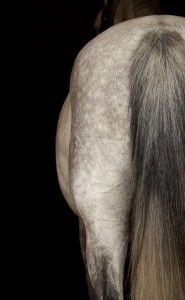
Then we practiced some of Lisa Cueman’s equine portrait techniques.  My image included here below is clearly inspired by one of Lisa’s images.  This angle of view is a bit counterintuitive, but the aesthetic forms of the horse from different angles like this is really eye-opening.

For a larger view, click on an image.

Lisa’s website is currently undergoing an update, so you may want to check it anew in July.
http://lisacuemanphotography.com/

Special thanks to David Middleton (and Claire Middleton) for providin this opportunity.
http://www.davidmiddletonphoto.com/