HDR photography (High Dynamic Range)

A camera’s image sensor has one job – to record light. However, sensors generally can only capture a limited range of light from shadows to highlights. When the actual range exceeds the sensor’s ability, that’s “high dynamic range” or HDR.

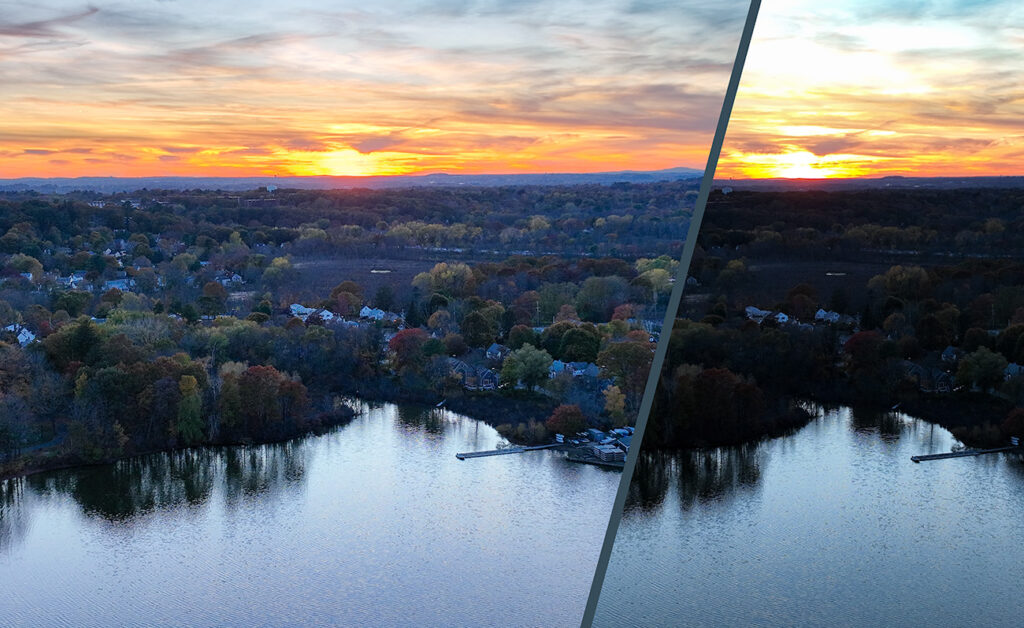
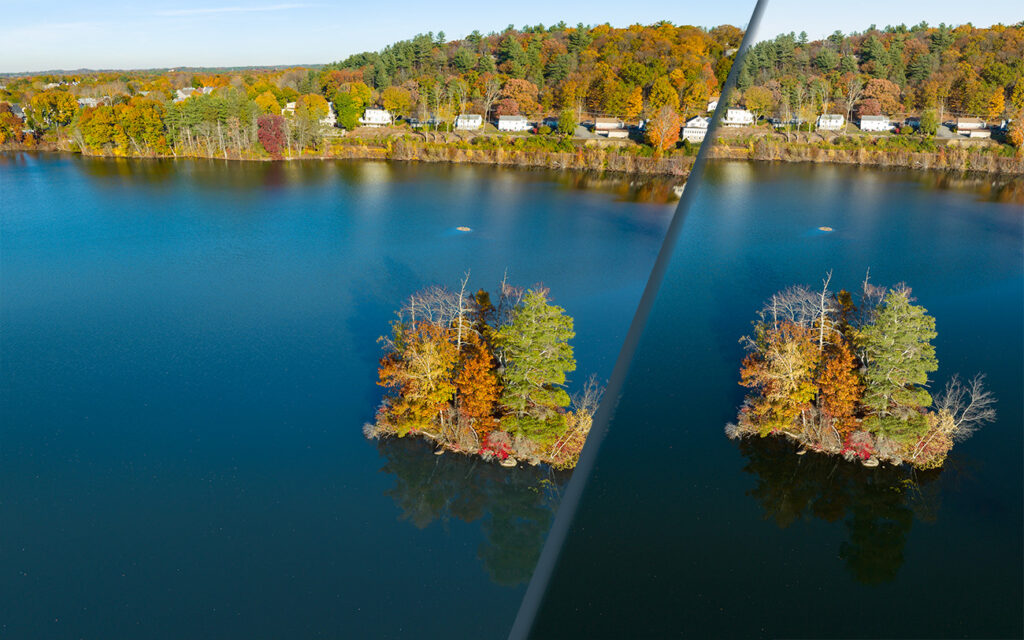
Here are two recent examples where the range of light exceeded my camera sensor’s ability. The first is a sunset. No surprise – the highlights are super bright. The second example is less obvious – the surface of a lake reflects blue sky in some areas and elsewhere the light simply falls off to black.

The solution is the same. Capture multiple exposures and then combine them together as a matter of post-processing. Many cameras have this post-processing and a built-in option. Even my smartphone camera includes that feature. The results may be disappointing. My own experience with camera built-in HDR processing is 50/50 at best. The end result is so commonly disappointing that I routinely don’t trust the camera to do it. Instead, I do HDR post-processing using software in a desktop computer.

This technique generally requires that the camera doesn’t move when capturing the separate exposures. The composition of the two captures is exactly the same. If the camera moves slightly, that is commonly not a problem because the two can be aligned during post.

This technique doesn’t work with video. When shooting video, the camera angle usually changes during the shoot; to shoot the scene a second time will result in a different video composition. Two captures will never align. For video, the solution to HDR is different – capture the shot just once but use a special camera mode that is very low-contrast, often referred to as DLog. Straight out of the camera, that shot looks truly awful. It must be post-processed, expanding the contrast range to something that appears correct.

Mavic Drone Photography – Post-Processing

With all digital cameras, my general practice is to capture RAW images instead of JPEG. Particularly when photographing with DJI Mavic 3 aerial drone, I not only capture RAW but additionally I frequently utilize exposure bracketing and HDR post-processing.

Portland Maine

The image shown here is the result of post-processing with Adobe Photoshop.

Having used the original DJI Mavic Pro, Mavic 2 pro, and Mavic 3, all have exhibited similar difficulty holding fine details in the highlights. This commonly occurs with architectural details under full sun; highlight details are easily lost. My solution is to use exposure bracketing and HDR post-processing; this means the original capture includes the best exposure, then two other exposures, one that is a bit brighter and one that is a bit darker. For the example, the photo here. I expected in advance that the highlights were at risk of getting lost; in retrospect, yes it was true.

The original three exposures are shown below. The best exposure is in the middle. As has been typical of Mavic 1,2, and 3, architectural details in white buildings have not been fully captured. The second problem is that the green trees are too dark. That second problem can be remedied in post-processing without much difficulty. However, if details in the highlights are blown out, recovering this can be difficult or impossible.

Initially, I perform basic adjustments in Adobe Lightroom and then open all three using “Open as layers in Photoshop”. That opens the three separate files as ProPhoto RGB (16-bit color depth) and with the adjustments made in Lightroom. Once opened in Photoshop, select all three layers and choose “Auto-align layers” in case the drone may have moved slightly between exposures. The best exposure I move to the bottom layer. From the other two exposures, I select specific parts of the image and these are overlayed over the bottom layer, effectively replacing problem areas.

Because the darkest exposure has retained all details in the highlights, I select the brightest areas from this exposure. Typically, this can be accomplished with either Photoshop’s built-in “Color range” selection. Once that selection is made, I often need to tweak it a bit, manually deselecting some areas that were selected but I don’t want those areas selected. Then feather the selection and convert it to a layer mask.

Using the brightest exposure, I similarly selected the green trees. That proved to be more difficult and I spent much time tweaking that selection. This selection is also converted to a layer mask. This replaces the overly dark trees in the base layer with a brighter version. Of course, you might use tools such as brightness or tone curve to lighten the trees in the base image, but the underexposed trees are more prone to luminance noise. Leveraging the brighter exposed trees does not suffer from noise, but is a bit more work to achieve.

There are alternative methods. I sometimes use Raya Pro by Jimmy McIntyre.

The final image is a composite assembled from three separate exposures of the same scene. I save this layered file as TIFF, but you can also save it as PSD (Photoshop format). I may merge all layers and export a JPEG file, but I keep the layered file. Commonly, I do return to this file and make further adjustments. For example, I may decide later that one or more of the exposures has noticeable noise or is not sufficiently sharp. The layered file allows me to make adjustments to the individual exposures.