Gloves for Winter Photography

Author Kevin Davis with the Meteor Mitt by Outdoor Research

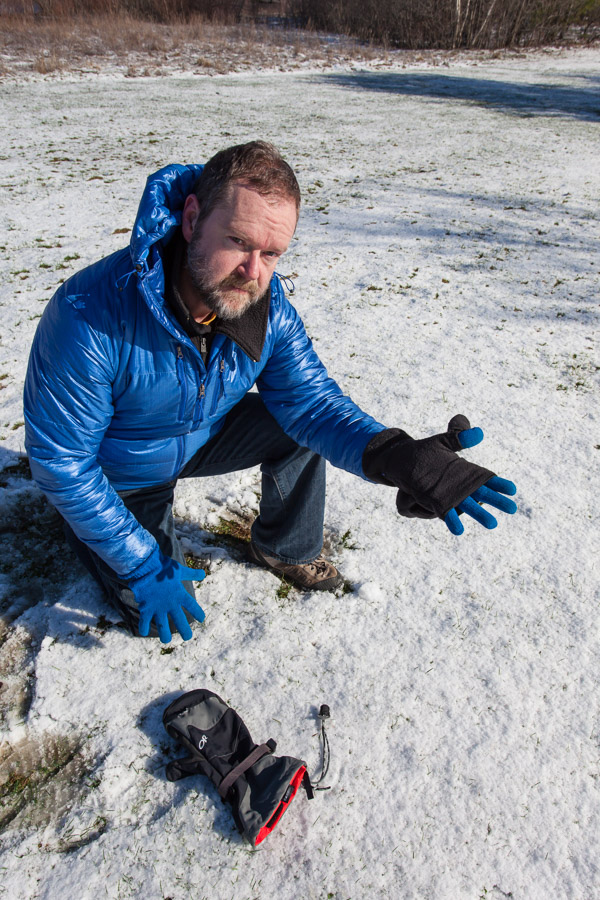
Operating a camera can be difficult (or impossible) while wearing gloves or mittens.  This problem is compounded if your fingers are very prone to becoming cold – perhaps your fingers get cold at a temperature that causes no trouble at all for some of your friends.  That’s the subject of my video: Gloves for Winter Photography.

Available products change every year; companies routinely invent new models and some older models may be discontinued. Of those that I have personally owned and used, here are my favorite lightweight gloves for mild temperatures (all are touch-screen compatible):

#3 REI: Grip Gloves
#2 Black Diamond: Powerweight Liner Series
#1 Burton: Screen Grab Liner

In the past ten days, I have twice used a glove seen in the video, a pop-finger fishing glove by Palmyth, which I paired with a touch-compatible glove liner. In advance of a snow forecast, I selected these gloves to wrap burlap around shrubs, a task that involves twine and tying knots. And for photography, I used these same gloves to pilot an aerial drone. With my fingertips covered merely by a glove liner, operating the touch-screen was beautifully easy. However, for a flight that lasted less than 15 minutes, my fingers soon became cold. As the air temperature was 33 degrees (f), this solution was barely adequate and would be a terrible choice for a shoot lasting an hour at that temperature.

Shown here are a couple specific glove-mittens (a.k.a. glomitts) that I tried but personally decided that they didn’t measure up. Both include a pocket to hold a heat packet, which is a nice feature.

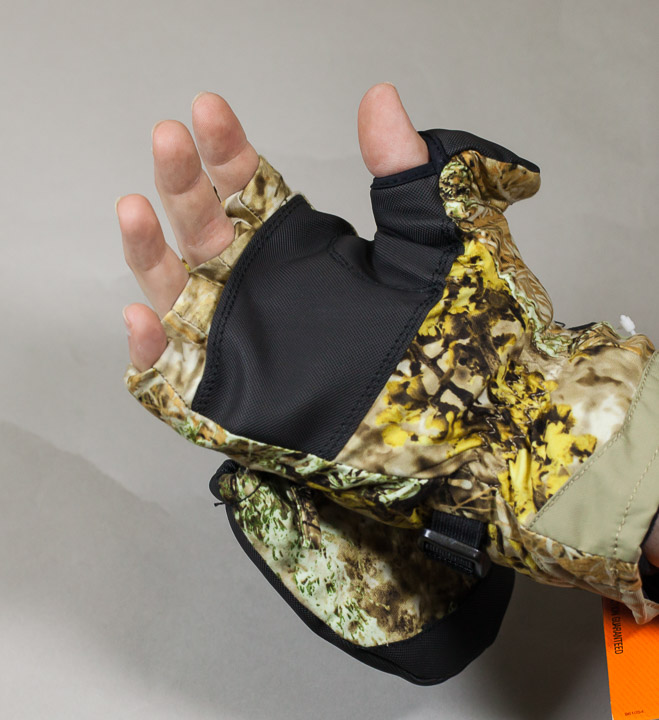
The first is an insulated glomitt from Cabellas. Unfortunately the finger openings were so snug that they could not accommodate a base-layer, a glove liner.  Since bare fingertips is not practical for my cold fingers, this product was unacceptable.

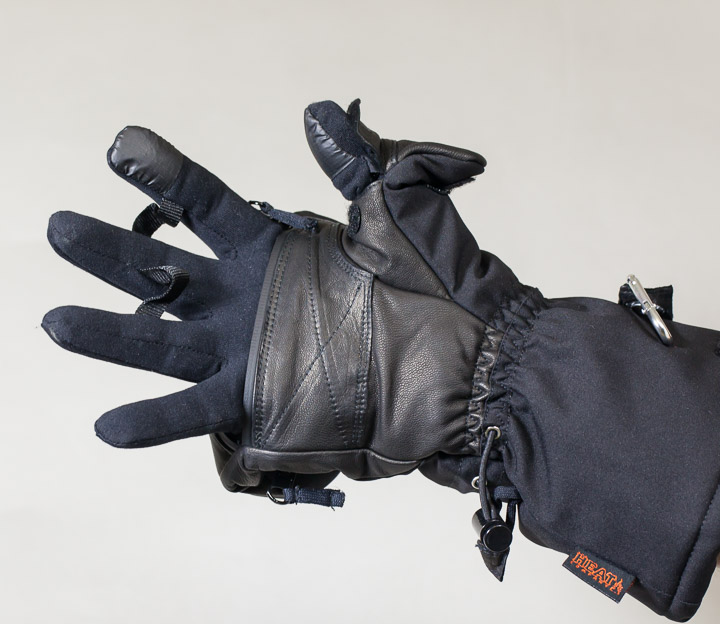
The second is an unusual full-finger glomitt, the Heat3 Smart glove. The interior glove and exterior mitten are fully integrated, the glove is not removable.  Having read very favorable reviews of this product, I tried it.  However, I was disappointed and promptly returned them. Considering the cost of these gloves is $150 (or more), I can get a battery-heated solution for about the same money.

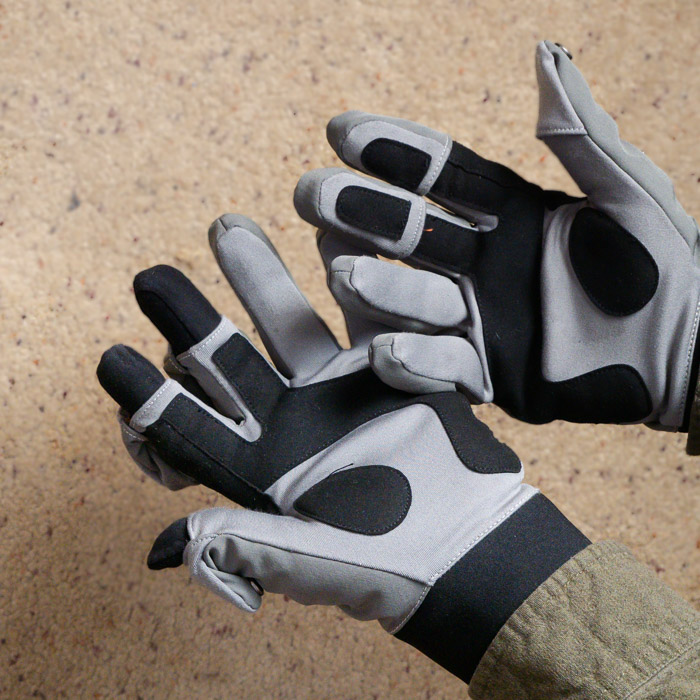
Despite the exceptional construction, the shortcoming of this glove occurs when in half-mitten mode.  With the mitten folded back and fingers exposed, this product is no better than a lightweight glove. If I need an extended period of time making photographs (with the mitten folded back), it simply is not adequate.  A slightly better solution is a half-finger glove with a lightweight glove underneath; therein, the fingers below the knuckle have a double-layer while the fingertips have a single layer.

I must also note that the Heat3 Smart gloves include a magnet. That can be problematic; see tip #7 in my video about gloves.

Winter Light (photography)

Winter Light (photography)

The grey season.  In the northeast, wintertime without snow is a drag, particularly for outdoor photographers.  I need some snow here.  Not just on the ground – we need snow sticking to tree branches.

This winter has brought a fair amount of precipitation, but it’s been rain rather than snow.  What little snow we’ve seen has quickly washed away as snow turned into rain. So here are a few shots from last winter.

Old grist mill, in winter


The first is an old grist mill. It is pretty – I hope that much is obvious. However, the light may not be obvious. The orientation of the mill and surrounding trees doesn’t catch much direct sunlight. The sun is setting on the other side of those trees. The light is what it is and there’s no changing it.

In photography, we have to be aware of the orientation of the subject with regard to the light.   When the light on the subject is not what we would prefer, you can sometimes move the subject, but not if the subject is a building.  You can sometimes move the light, but not if the light happens to be the sun.  You might come back at a different time of day, when the sun is in a different position.  However, I believe this mill is in shadow of the trees both morning and evening.

Church at sunset
Church at sunset

Sometimes, in outdoor photography, using only available light, there’s nothing you can do to change the light on the subject. But you might find a different subject to photograph. Across the street, a church was catching the light of the setting sun. So, I photographed the church. And next to the church is a historic one-room schoolhouse. Nice light, eh?


(To see a larger view, click on any image. )

One-room schoolhouse

I included this last image (schoolhouse) in a recent 2015 wall calendar.

Backyard Bird Photography

In 2011,  wildlife photographer Jeff Wendoff told me that I must add wildlife to my photography portfolio.  Got some tips on basic backyard bird photography from Jeff and photographer David Middleton.  The wheels of my progress may move slowly, but they do move.

( Click on any image to see a larger view )

By end of 2011, I had prepared a place to hang bird feeders within clear view of my home windows and I hung my first bird feeder. Within two weeks, the birds began to find the new feeders.  However, having created natural perches for the birds in precise locations where I wanted them to land,  they were not perching here.


A few days ago, I saw the birds begin to perch in the places I had prepared.  When I awoke this morning, there were many birds and they were perching in the right locations.  So I photographed backyard birds for the first time.  It just so happened that snow was falling, which added an extra special touch of beauty.

Sitting next to a window and photographing from the comfort of my home, these birds are perhaps 35-ft away. I found that my telephoto lens did not have quite enough reach.  The birds appear quite small in the original images; so the photos attached here are cropped about 50% from original size.

I used a class of camera known as Micro Four-Thirds (MFT) with a 45-200mm lens at maximum telephoto (200mm).  If I had used my Full-Frame DSLR, I would have needed a 400mm lens to capture the same field of view.  That’s because the image sensor on any MFT camera is 1/2 the size of Full-Frame  (for you Nikonians out there, that means “FX” format).  To get a tighter shot, I will need big glass.