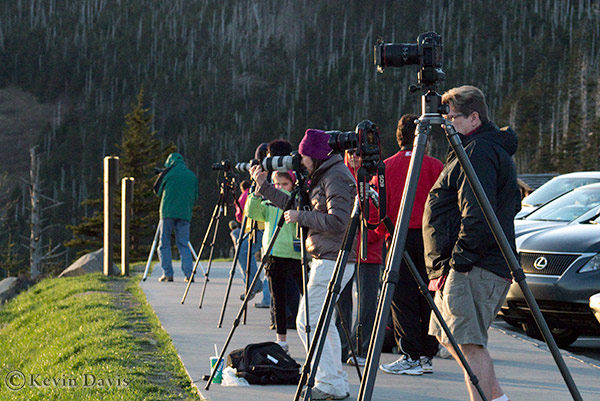
When the Light is not quite what you want

Friday evening, as Hurricane Irene thrashed the coast of Florida, the weather in New England was clear and the warm glow of the setting sun raked across the land.  I went a short distance down the road to photograph the river.   But, to my surprise, the light on the weeds and grasses was largely back-lit and unflattering.  So I planned to return and try again Saturday morning, as the weather forecast called for overcast clouds.

Soft light / overcast sky

As expected, the morning provided soft diffuse light and I snapped a few images.  To get a bit of elevation above the river, I used two familiar tools.  One, a portable telescoping ladder.  Two, a tripod fully extended and raised far over my head.  The latter requires a bit more shutter speed to compensate for the unstable camera perch. 

A bit later, after returning home, the sun was peeking through the clouds and I considered repeating my brief excursion in different light.  But, in the end, I did not.

As you can see in the image here, the soft light features no distinct shadows.  This is not automatically good or bad.  A diffuse light avoids high contrast and specular reflections, but it can also reduce sense of  shape and depth.  A moderate light from the side (side light) will wrap around a subject and enhance the subject shape.  But too much and the shadows may be too dark, loosing all details.

When dealing with natural light (not electronic flash), sometimes we can anticipate the light we want.  But sometimes, the light really is not doing what we expect or want.  When that happens, sometimes the right thing to do is simply try again after the light has changed.


Park Wildflower Project

multiflora rose

Working at an office park, anyone with an inclination towards the outdoors world … simply has to get out of the office and walk.  In this course, I discovered that numerous wildflowers grow around the periphery of the park.  Being both photographer and sometimes amateur naturalist,  I began photographing and cataloging the various flowers. 

That was the humble beginning of what I will refer to as the Park Wildflower Project.  My catalog is more than 60 species …  but I’m not done yet.  I find it necessary to return frequently.  From year to year, the species can vary.  (This year, Common Tansy has invasively taken over the northwest meadow.)  I find flowers that I have not seen before;  and I no longer find some of those that I have seen.

 For identification, I rely primarily upon two books.  For a quick visual reference, I like “Wildflowers in the Field and Forest” by Clemants and Gracie.   But that’s not always enough.   Newcomb’s “Wildflower Guide” is absolutely essential !


CreativeLive.com

If you have not yet heard of CreativeLive, you are really missing out!
Free training on a wide variety of subjects: studio portraiture, food photography, wedding photography, film-making with DSLR, Photoshop, Lightroom, Final Cut Pro, making eBooks.   Great instructors such as Art Wolfe, Zack Aris, Vince Laforet.

This weekend’s 3-day class is taught by Gail Tattersall, director of photography for film and television (http://galetattersall.com).

It’s simple.  Go to CreativeLive.com, see what classes are coming soon.
Four ways to learn

  • to attend in-person (Seattle WA), you can apply per each class
  • watch live for free on the internet
  • watch re-broadcast free at the end of the day
  • purchase video download

The internet video stream is available in two different sizes, standard and low-bandwidth.
A smart phone or iPad should handle the low-bandwidth stream just fine.

If you want to have the video permanently, you can purchase video download.  In fact, this is how CreativeLive operates as a buisiness.  The content is so good, many people pay for the video. 

I’ve been happily learning from CreativeLive classes ever since their first 3-day class more than a year ago.  Back then, there were some technical glitches (e.g. loss of audio), but those days seem to be long gone.  The reliability of the internet video stream has been really solid.  More important, their instructors and class content have been stellar.

www.creativelive.com

.

Equine photography

A fun and eye-opening day today photographing horses with Lisa Cueman and David Middleton. 

With a forecast for rain, we headed out to visit the horses early in the day.  (David’s wife, Claire, responded that sometimes in rare momemnts,  David does something smart.)

First, we had the opportunity to photograph the younger horse, Reva, running.  Being cooped up in the barn all morning, Reva welcomed the oppotunity to run around.  Then, after a expending some energy, was more accepting of standing around for some portraiture.

The technique of photographing a moving horse is theoretically similar to photographing a person running or riding a bicyle.  A perfectly sharp image requires a high shutter speed, but this is perhaps not the best idea because the photo fails to communicate motion.  Instead, we were shooting around 1/100 second and then following the horse’s movement by panning the camera.  With a bit of practice and a bit of luck, you can get a sharp image of the horse, but the feet show motion blur.

Simple right?  Well, maybe not.  In reality, an animal’s movements are unpredictable, making unexpected turns, stops, & starts.  So there is a bit of “spray and pray”.   Set the camera to take multiple photos in quick succession, press the shutter button for a few seconds, capturing numerous images, … and pray a few of them look good.   This is necessary particularly because the feet are constantly changing position and the most aesthetic position cannot be predicted.  Don’t think that it is simply dumb luck; it’s not.  As a photographer, you have to pay close attention to everything … but the position of the feet … that is mostly luck.

Then we practiced some of Lisa Cueman’s equine portrait techniques.  My image included here below is clearly inspired by one of Lisa’s images.  This angle of view is a bit counterintuitive, but the aesthetic forms of the horse from different angles like this is really eye-opening.

For a larger view, click on an image.

Lisa’s website is currently undergoing an update, so you may want to check it anew in July.
http://lisacuemanphotography.com/

Special thanks to David Middleton (and Claire Middleton) for providin this opportunity.
http://www.davidmiddletonphoto.com/

Infinite storage for photos and video

Maybe you are running out of storage space on your computer … because of video or fat megapixel photos.  Or maybe you need to backup your files, for safety (in case your computer storage drive should die).  You might save to optical disk (CD, DVD, or BluRay disc) but the storage capacity is quite limited.   A standard DVD will store less than 5GB.  A BluRay disc stores up to 25GB and a dual-layer BluRay disc will store 50GB. But that is still not enough.

You may be contemplating adding a disk drive with larger capacity.  But sooner or later, you will fill up that amount and still need more. Cramming bigger disk drives into your computer is only a temporary solution.  External disk drives provide a long-term solution of unlimited storage. 

Let me suggest a relatively low-cost option called an external hard drive dock.  A dock is basically an adapter that allows you to use internal type drives externally.  Why? Because internal type drives simply cost less than external drives. If you divide the price by the number of gigabytes, external drives range from 6 – 20 cents per gigabyte, while internal disk drives range from 4 – 14 cents per gigabyte. Removing a drive from the dock, then inserting another drive, requires mere seconds.

How does an external disk drive or dock connect to your computer?  Here is a quick survey of available interfaces.
USB 2.0 : up to 480 megabit/sec
USB 3.0 : up to 4.8 gigabit/sec
eSATA II : up to 3 gigabit/sec 
eSATA III : up to 6 gigabit/sec
1394a FireWire 400 : up to 400 megabit/sec
1394b FireWire 800 : up to 800 megabit/sec
1394d Firewire 6400 : up to 6.4 gigabit/sec
Thunderbolt : up to 10 gigabit/sec

Strangely, these interfaces are typically rated for throughput in units of Mb/sec (megabits per second), while disk drives are rated in terms of MB/sec (megabytes per second).  The difference is simply a factor of eight.

Inside your computer, long-term data storage devices are typically based upon SATA. 
SATA II (a.k.a. SATA 3Gbps) provides data transfer capability much faster than most disk drives.  (A SATA II disk drive will typically move data to-and-from your computer at a rate less than 700 megabit/sec.)  SATA III was introduced to support solid-state drives (300 to 500 megabyte/sec).  External SATA (eSATA) allows external devices to connect directly into your SATA storage system.  This is ideal for connecting external storage, but most computers do not include any eSATA ports.

Firewire has some interesting technical features, but current products do not offer speeds above 800. Thunderbolt is very new, currently available only with the new 2011 Apple MacBook Pro. (Just within the past couple months, there has been a rumor that Sony will soon offer Thunderbolt on an upcoming Vaio laptop computer.) 

In 2011, USB 3.0 seems to be the clear winner.  Simplistic speed ratings suggest that USB 3.0 is faster than eSATA II, but some tests have reported that this is not necessarily true for currently available USB 3.0 products.  While USB 3.0 usually outperforms eSATA when reading data, eSATA may have a slight advantage when writing data.

If you already have an eSATA interface, you can buy an adapter that converts between eSATA and USB 3.0. (available from Bytecc, Addonics, and NewerTech.)  Cost is about $35 – $40.  But for a bit less money ($30), you can buy an expansion card that adds USB 3.0 ports easily to your existing computer (if you have an available PCIe expansion slot). 

If you are buying a new computer in 2011, read the specifications carefully to make sure you get USB 3.0.  While you can connect a USB 3.0 devices to a USB 2.0 device, they will communicate at the lower speed.

If you are looking for a high-capacity disk drive, here is a 2010 comparison of 2TB drives:
http://hothardware.com/Reviews/Definitive-2TB-Hard-Drive-Roundup

St.Patricks Day Parade in Southie

From California to Georgia, there are a dozen notable St.Patrick’s Day parades that are staged annually in the United States.  But the mac daddy of them all occurs in South Boston.  In 1737 the Irish Society of Boston hosted the first parade to honor St. Patrick’s Day.  Today, this parade can draw a crowd of spectators numbering more than 800,000.  You won’t find big expensive floats like the Rose Bowl Parade or Macy’s Thanksgiving Parade, but come on now … the Irish are bit more down to earth.  This parade is a casual affair.  People have fun.

Above all else, anyone thinking of attending this event should be aware of one thing … don’t expect to find a parking space!  Take public transportation.  Parking in Southie is a scarce on normal days; but when the parade route is cleared of all parked vehicles, those displaced vehicles (belonging to local residents) fill every available nook and crany.

 The light was a bit challenging this year … bright sun and deep shadows.  In such situations, a little fill-flash is often the solution to reducing unwanted facial shadows.  Though I had a flash in my bag, I neglected to use it because it has been quite some time since I have done a shoot in this light.   This means a lot more work in post-processing to recover the shadow details (not something I really want to do if I can avoid it.)

(click on an image to see a larger view)

http://www.saintpatricksdayparade.com/boston/boston.htm

Custom PhotoBook

My most recent book was created with Photobook.  Photobook has several branches all over the world; I used Photobook America, located in Toronto.  Time to print with Photobook was significantly longer than past experience with Blurb and MPIX.  Perhaps related to two factors.  This latest book has a silk cover with a photo inset into a center window.  And I ordered multiple copies.  Blurb will print a book with full-bleed photo cover in just a few days. And  have seen MPIX (outsourced to DigiLabs) create books literally overnight.

At the time I printed with Photobook, both Photobook and Blurb had recently begun offering a new premium paper option called “luster”.  I tried it.  But honestly, looking at four books printed over a time span of 18 months, printed by three different companies …  I don’t see a significant difference in image quality.  They all have a slight sheen to the surface. Maximum black density is similar.  Image quality is entirely comparable.  As near as I can tell “premium” paper options provide only two differences: thickness and opacity.  All three companies print with an HP Indigo digital press. 

Photobook’s downloadable software is called Photobook Designer.  I found it easy to use; very comparable to Blurb BookSmart and (MPIX/DigiLabs) My Photo Books.  However, there was one problem.  For my title page, I created a graphic image with transparent areas, saved as a PNG file. The Photobook Designer software recognized PNG files with no problem.  The preview (prior to upload) looked great.  But when the book was printed, the title-page graphic was unrecognizable.  (I also used a PNG on the final page of the book and this printed just fine.)

I contacted Photobook support twice via email, including a screen-capture from the book preview (what it should look like), but received no responses; apparently their support systems were down for more than a week.  Upon calling via telephone, someone readily worked to assist me with the problem.  The book is actually printed from a PDF and they shared this PDF with me; my title page graphic was mutulated.  The problem was not the press.  The problem was not on my end. Something went wrong in upload or translation to PDF.  But because their web site states only support for JPG and TIFF, they suggested that PNG files are not guaranteed.  Photobook would not reprint the books at zero cost to me.  They did reprint the books at a deeply discounted price, after I replaced the PNG with a JPG.  (This was not a trivial replacement. I originally used PNG because it supports transparency; JPEG does not.)

This latest book was simply a personal collection of favorite images from the past year.  A couple of the images are shown here.  Click on the image for a larger view.

For more information about comapanies that help you create custom photobooks,
I recommend PhotoBookGirl.com.  (I am not affiliated with PhotoBookGirl; but I find
it is a good source of information.)

Essential Guide to Memory Cards


The two most common types of memory cards are Compact Flash (CF) and Secure Digital (SD).  Compact Flash was first introduced 15 years ago and is still used in many new cameras.  SD format is physically smaller and is more suitable to smaller cameras.  For larger cameras that can accomodate CF, some people find that the larger size of CF cards is easier to manage. Many SD cards today will actually be SDHC (Secure Digital High Capacity).  If you have an older camera, be careful to read the camera specifications to understand if you can use SDHC cards. 

From a technical perspective, both CF and SD/SDHC have evolved to offer increasing speed and storage capacity. In general, CF supports a maximum storage capacity 128 gigabytes. (The newest revisions can support far more.)  The original SD supports up to 4 gigabytes. SDHC supports up to 32 gigabytes. SDXC supports up to 2 terabytes (1TB = 1000GB).

The photo attached here shows three memory cards: xD, micro SD, and SDHC.  Micro SD cards are commonly used in mobile phones and come with an SD adapter, which is essential if you need to insert the card into a card reader. xD has been used by some Olympus and FujiFilm cameras, but both these vendors seem to be phasing out the xD cards in 2010 (see: http://en.wikipedia.org/wiki/XD-Picture_Card).  The xD card in this photo was taken from an 4-year-old Olympus camera that accepts both xD and SD cards.

Historically, Sony cameras have exclusively used a proprietary card type called Memory Stick.  This decision by Sony (to ignore standard card types such as CF and SD) has been a nuisance to camera buyers for a decade.  In a very significant and obvious change, new Sony camera models introduced in 2010 support both Memory Stick and industry standard SD/SDHC cards.

Not all cards are created equal.  Some memory cards will read or write faster than others.  The write speed can affect how fast your camera can save an image to the card.  Furthermore, if your card is too slow, it may not be compatible with some newer high-resolution cameras, that require high-speed cards in order to save fat megapixel images.  Before buying a memory card, I highly recommend that you check Rob Galbraith’s memory card database (www.robgalbraith.com/bins/multi_page.asp?cid=6007). 

To copy photos from your camera, you have four options. Most cameras can connect to a computer via a USB cable. Doing so, the camera appears to the computer as a simple external storage device, just like a flash drive or external disk drive.  Altneratively, you can remove the card from the camera and use a card reader, connected to your computer.  If your camera is built-in to a cell phone or tablet, you may be able to send your images via email (possibly incurring fees for large amounts of data). Finally, some cameras support a wireless connection, such as BlueTooth.  For some cameras, wireless connectivity may be available via a camera accessory that must be purchased separately.

Not all memory card readers are equal.  In the photo shown here, both card readers connect to a computer via USB.  Both accept a variety of different cards.  The big difference between the two is speed.  One supports Ultra DMA and the other does not.  Be careful to read the fine print before purchasing a card reader.  Using a slow card reader can be frustrating, particularly if reading 8GB or more.

Lastly, a particular note regarding video cameras.  With the advent of newer memory cards offering both fast write speed and high storage capacity, video cameras have quickly moved away from magnetic tape storage in favor of memory cards.  Some cameras allow you to record for indefinite periods of time by providing two card slots and automatically switching when the current card becomes full.

Trees @ Mt.Auburn

Trees @ Mt.Auburn

When you get the urge to make some outdoor photographs, do you have places that you return to repeatedly?  Would one of those places be a cemetary?   Likely not.  But, Mt.Auburn cemetary (in Cambridge Massachusetts) hosts a marvelous array of flowering trees.  It really is a beautiful place, (with or without tombstones).

Today, I received another canvas print (from ArtisticPhotoCanvas.com) of an image from Mt.Auburn.  So, I am just sharing this image with you, along with another Mt.Auburn image, which I had printed earlier this year (also printed on canvas by APC).

   (To see a larger version, click on the image)


The most recent print is apparently an azalea shrub, though I do not know the exact species.  It is photgraphed with a Canon 100mm f\2.8L macro lens.  (My experience has been that this lens is superior to using a non-macro lens coupled with an extension tube)

The second is a crabapple tree, photographed with the Canon 70-200mm IS f\4.

WorldWide PhotoWalk

Today was the third annual WorldWide PhotoWalk, sponsored by Scott Kelby.  Although I volunteered to lead a walk in Rockport, someone else beat me to it.  So, instead, I joined someone else’s walk in Boston.

Because we walked through the streets of Beacon Hill in Boston, there were a lot of architectural photographs.  One image I am including here is a wide angle, tight crop, and at an odd angle in order to completely fill the frame.

Click the image for a larger view.