The tulips at Boston Public Garden. are an annual rite of spring. They are fun to photograph and I wanted to share some techniques with you.
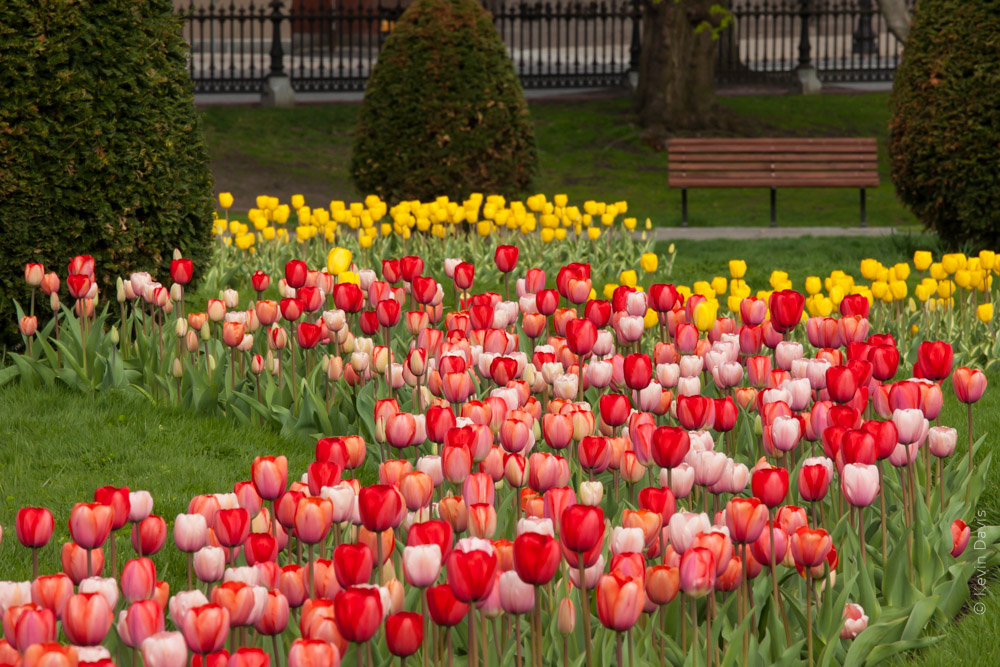
This first image was shot at 7am on a Saturday morning. Early morning may be the only time when the garden isn’t swarming with people. To visually compress the distance, I used a 200mm lens.
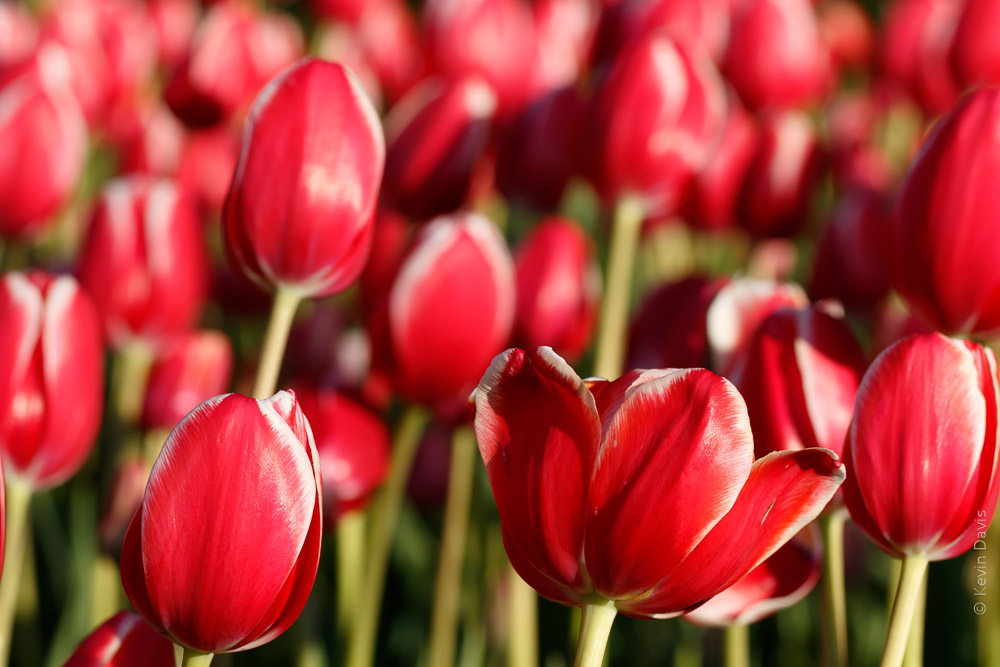
This next image is different for several reasons. Of course, this is a closer view. Using a 100mm macro lens at an aperture of f/7, the depth of field is shallow. I chose to fill the frame with flowers and exclude the surrounding environment. Also note that the light is very different. I shot this image after 6pm with the evening sun directly shining on the flowers from the side.
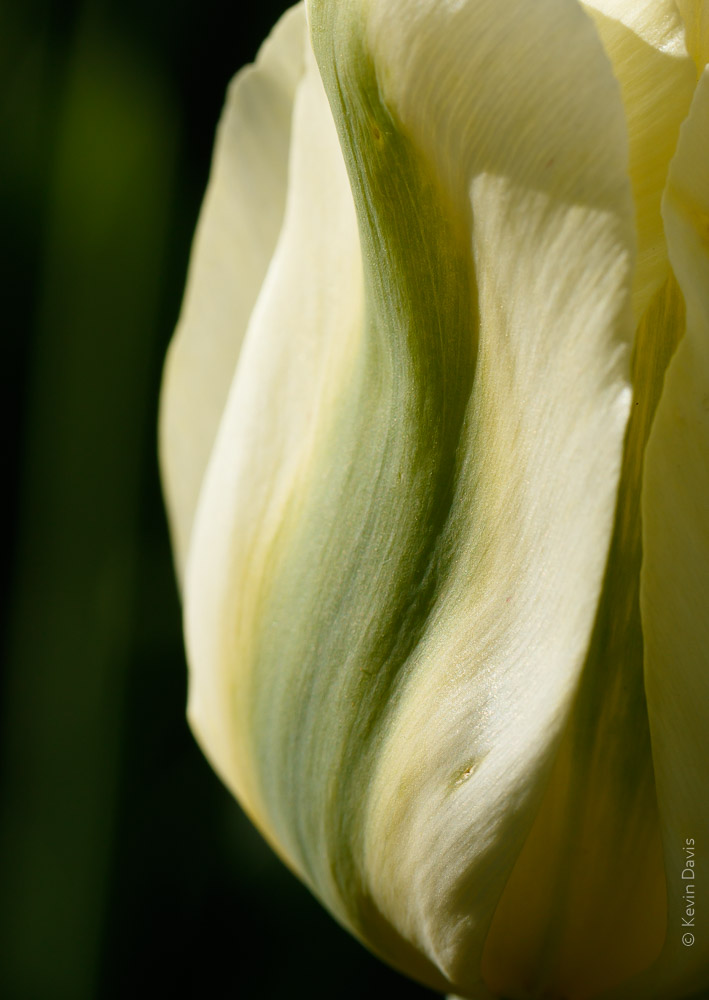
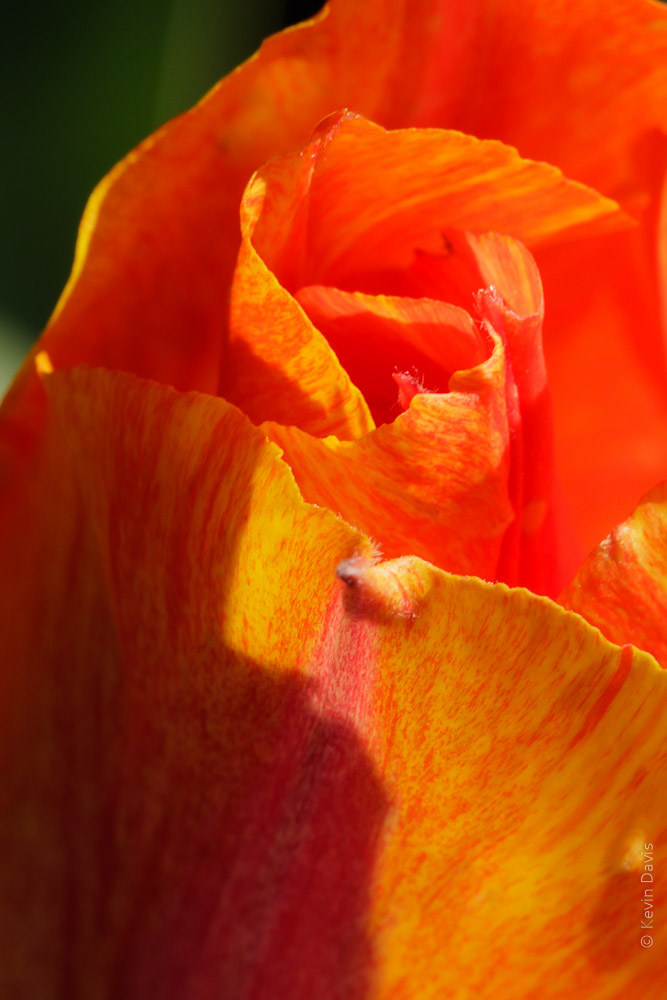
Getting even closer, the image becomes more abstract. The image is about color and texture; the concept of “tulip” begins to disappear. I specifically chose to use an evergreen shrub for the background, knowing it would fall away to black because this side of the shrub is in shadow. (You can dimly see a green tulip stem rising along the left side of the image.)
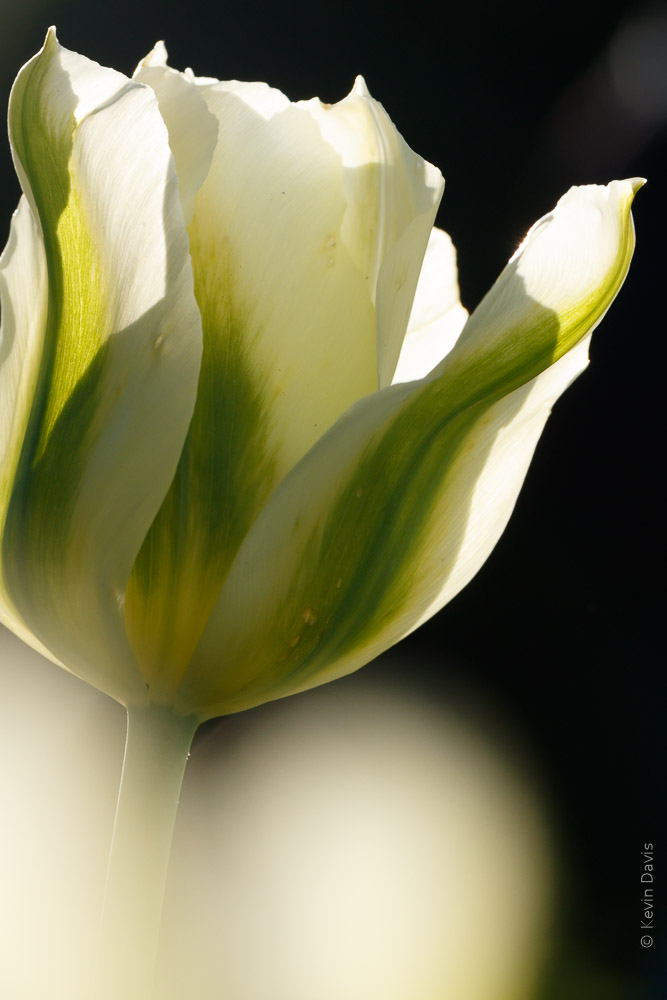
Taking a step back, not as close as the previous image, this is more obviously a tulip. Still working with the dark background, I’ve repositioned myself to achieve back-lighting from the setting sun.
Additionally, I chose to break a couple photography “rules”. Intentionally photographing through a foreground tulip creates a highlight in the bottom left. It was a gamble that I think paid off quite well. A viewer will naturally be drawn to the lower highlight and the upper highlight. After bouncing back and forth a few times, you eventually find the beautiful color and texture in between. I find that my mind dwells on this image longer than the others.

A combination of backlighting, dark background, and close-up abstract shape.
Upon thinking “how can I look at this subject with a different perspective?” I finished up the evening by looking down on the flowers from a steep angle, as the sun was soon to fall behind the buildings of Boston. I chose a more narrow aperture here, f 16, because I wanted to hold some depth of focus from foreground to background. And because a smaller aperture means less light entering the camera, I increased the ISO. Aperture priority, f/16, 1/160 sec, ISO 800, 100mm macro lens.