Until now, 4K (also known as ultra-high-definition, or UHD) was the realm of cinema … movie theaters. But 4K televisions began to enter the retail stores in 2013. We will surely see more of this in 2014.
In parallel, we have been seeing consumer cameras that support 4K, many of them selling for less than $1000 US. This poses a technical challenge for small film makers … a data rate four times higher than HD. (May have to update your video-editing equipment.)
Here is the history of 4K cameras costing $5000 or less.
Blackmagic Production Camera (2012)
JVC GY-HMQ10 (2012)
GoPro Hero3 (2012)
GoPro Hero3+ (2013)
Sony PXW-Z100 (2013)
Sony FDR-AX1 (2013)
Sony A7s (2014)
JVC FDR-AX100 (2014)
JVC GY-LSX2 (2014)
Panasonic GH4 (2014)
Panasonic FZ1000 (2014)
The lens included with a GoPro Hero 3+ has a focal length of 2.5 mm and has a field of view akin to a 14mm lens on a full-frame DSLR. It is “fisheye”. You can set the camera to a narrow capture setting, but this will crop the image, discarding some of the pixels.
Replacing the lens mount in a GoPro Hero3+
Super wide is fine if you are attaching the GoPro to your helmet or a surfboard. For me, the stock Hero3 lens is too fisheye and I want a narrower field of view.
There are many available replacement lenses, but most lack the quality required to capture 10 megapixel images. Most lenses are good enough quality to capture 5 megapixel images. I found two companies that sell a 5.4mm lens, having a 60 degree field of view, and rated as being sufficient for 10 megapixel images: RageCams (USA) and Vision/Dimension (Germany).
On paper, these two products seem equivalent, but there are a few important differences.
The 5.4mm lens from RageCams is easier to install. The lens from Vision/Dimension requires disassembling the camera and replacing the lens mount.
If you do it yourself, the cost of a 5.4mm lens from RageCams is higher than the cost of a 5.4mm kit from Vision/Dimension.
If you don’t want to mess with the camera yourself, you can pay RageCams to do the replacement for you. The cost of parts and labor is more than the cost of the GoPro Hero3+ camera
The Vision/Dimension lens includes infrared filter for daylight use. The RageCams web site states that an IR filter will cost you an extra $55.
Huh? What’s the problem deal with the lens mount?
The lens mount is a standard M12 lens mount, a simple threaded barrel. To change the lens, you theoretically unscrew the existing lens and screw in another lens. However, if I understand this correctly, there is a subtle quirk to the GoPro lens mount, which may mean that your new replacement lens will not focus properly. The lens mount is a female-threaded tube, but apparently the full length of the tube is not threaded; the front-most part lacks threads. If your new replacement lens has a short barrel length, you will be able to screw it in, but the distance to the image sensor will be too close for proper image focus. The 5.4mm lens from RageCams has a slightly longer barrel than the same lens from Vision/Dimension.
Lens replacement options
Option 1:
Ship your GoPro Hero camera to RageCams and have them replace the lens. This is both the simplest option and the most expensive option.
Option 2:
Buy a replacement lens from RageCams and replace it yourself.
To grip the lens with a pliers, you first need to remove the decorative plastic ring on the outer body of the GoPro. This part is quite simple and you can find videos on YouTube that show how it is done.
The lens is fixed in place with a bit of thread-lock. To unscrew the lens, you probably have to apply heat to the lens with a heat gun (without melting anything). Again, there are helpful videos on YouTube.
Option 3:
Buy a replacement kit from Vision/Dimension and replace it yourself. This kit includes the lens and a lens mount that is fully threaded. Replacing the lens mount is a bit difficult www.vd-shop.de/instruction-replace-gopro-lens-a-80.html
Option 4:
Install an adapter that allows you to use almost any lens. While this enables the use of high-quality lenses and allows the use of variable-aperture lenses, it necessarily makes your GoPro physically larger and heavier. Refer to this link: www.back-bone.ca
I bought the Vision Dimension kit. While the price of this kit seems significantly less than cost of a comparable lens from RageCams, there are hidden costs. Shipping from Europe to the USA cost me $45 and then I received a bill from Federal Express for an import duty of $20. In the end, buying from Vision Dimension did not save me as much money as I had thought it would.
Looking at the photo at the top of this blog, you can see “10MP” (10 megapixel) is printed on the lens. Also printed on the lens (not visible in this photo) is “IR Cut”, indicating that a daylight IR filter is present.
Disassembling a $400 camera, that has really tiny parts, is not a task for the faint of heart. A video from Vision Dimension demonstrates the procedure; you can view that before making your decision. To avoid this hassle, pay a bit more money and buy the lens from RageCams.
If you replace the lens yourself …
You have somehow replaced the lens … and now need to adjust it for sharp focus.
Start by setting the approximate focus; load the GoPro app on an iOS or Android device to achieve a live preview of what the camera is seeing. When the focus looks good, here is an extra step to ensure that the focus is as good as possible.
Temporarily make a few markings on the outside of the lens; I attached five small pieces of white tape. Adjust the lens to each mark, one at a time, and capture a photograph.
Study the resulting photos at high magnification and pick the sharpest photo. Adjust the lens to the corresponding lens mark.
Repeat the procedure on a finer scale. I captured three photos, one on center, one slightly to the left, and one slightly to the right.
You do need a dab of glue or thread-lock to prevent the lens from turning inadvertently. You might put this on the threads before inserting the new lens. I was afraid that this might inhibit lens adjustment, so I adjusted the lens first, then unscrewed the lens, added a dab of glue to the threads, and re-inserted the lens. The trick to this is to count the number of revolutions when unscrewing the lens, so that you can easily get back to the point of sharp focus. Personally, I counted 13.5 turns of the lens. (In retrospect, the glue I used did not set quickly and I could have applied it before first inserting the lens.)
Finally, note that the new lens sticks out a bit further from the Hero camera body, compared to the original lens. It’s probably not going to fit in the waterproof housing. The Vision Dimension kit includes a spacer ring that you put between the Hero and the housing. The RageCams web site advises that you remove the foam cushion from the rear door of the housing.
In the end, I am disappointed with the image quality from the Hero3+. While I believe this is largely due to the camera, I have not as yet proven/disproven the claim that this lens is good enough for 10 megapixels.
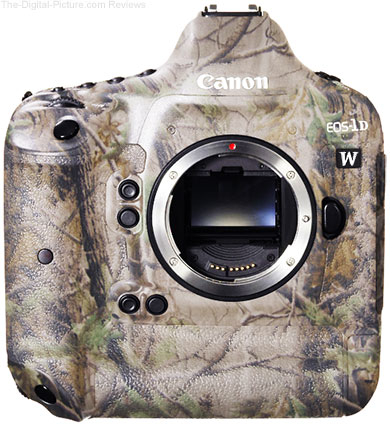
TheDigitalPicture.com breaks news of a top-of-the-line DSLR for wildlife photographers.
Reading some of the features, I arrived at … Birds in-flight focusing mode!? Wow! Animal Eye Tracking!? Amazing. A built-in sound generator to produce animal calls. Incredible … maybe literally, not credible.
But of course, today is April Fools day. Well played, Sean and Bryan.
Some photographers are very brand-loyal and biased, particularly regarding Nikon and Canon. All I can say is … thank goodness for Canon AND Nikon, competetively driving each other to create excellent cameras.
Here are a few highlights from the history of DSLR cameras.
(intentionally ignoring digital backs for medium format cameras)
1991 Kodak DCS-100 … first DSLR (based on a modified Nikon body)
1995 Canon/Kodak DCS 3 … Kodak digital camera back on a modified Canon body
1999 Nikon D1 ………. first practical/affordable DSLR for mass market
2001 Canon 1D ……… landmark for sports photography; 8 fps and reduced shutter lag
2002 Canon 1Ds …….. first DSLR with a full-frame sensor
2004 Fujifilm FinePix S3 Pro… first DSLR with live preview
2007 Nikon D3 …………. Nikon’s first Fx (full-frame) DSLR
2007 Canon 1DS mkIII .. 21 megapixels, first DSLR to exceed 18Mp
2008 Nikon D90 ……….. first DSLR to shoot 720 HD video
2008 Canon 5D mkII …. first DSLR to shoot 1080 HD video
2012 Nikon D3200 ……. 24 megapixels, Nikon’s first DSLR to exceed 18Mp
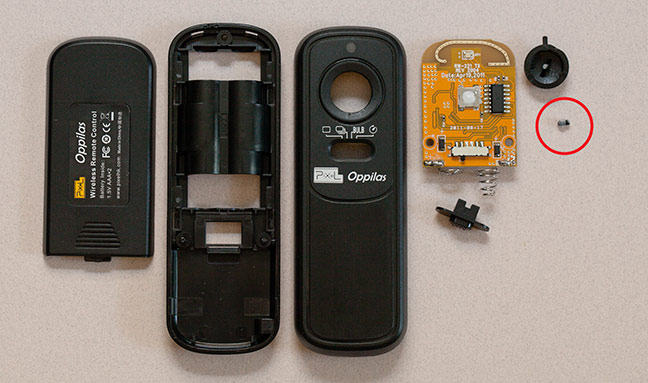
Some situations require remotely triggering a camera. The RW-221 is an inexpensive remote trigger. It looks well made and worked well in my initial testing, however … the first time I ever used the RW-221 for a real shoot, it broke.
There was a dense crowd of people in Boston that day and someone tried to squeeze between me and the shrubbery … I lost balance and pushed hard on the button of the RW-221. The button slid into the plastic case such that it could not pop-up (the normal un-pressed state). I was on location and had no backup for this tool.
Upon taking it apart, I found that the plastic button is supported by a very small plastic pin, which easily snapped under pressure. Although I repaired it with a bit of glue, I have to conclude the following:
1) due to a design flaw, the RW-221 is not robust/reliable; be gentle.
2) always have a backup for your equipment
2) anyone who has this device or is purchasing it new, take it apart and re-inforce the pin with a bit of epoxy
There are telephoto lenses and there are telephoto zoom lenses.
Then there are tele-extenders which increase the magification of a lens.
And … then there is this; three telephoto zooms in one lens.
However, it is still not available today, though originally planned for release in mid-2011.
Price tag (yet to be announced) may cause shock or heart arythmia.
Having a local camera store is very nice; not everyone does. North of Boston, there are a few. My preferred store is Hunts Photo & Video, in Melrose. Calumet has a store in Cambridge. There are a few more stores directly within the city of Boston. I have a friend who lives in Newton and he likes Newtonville Camera (but I have never been there).
More than a decade ago, Hunts would hold an annual camera show at the World Trade Center in Boston. That was a terrific event! But since they have ceased to do that show, they hold a small event twice per year in the Melrose store … and I believe once per year in their other locations. This weekend is one of those events. There are several educational presentations throughout today and tomorrow, but only one that I thought might be interesting to me. Honestly, the autumn event is better than the spring event.
I spoke with a Canon representative regarding the EOS 5D mk III. Special pricing was a mere $50 rebate (or discount, I’m not sure). That’s trivial. If they have the camera in stock (I expect that they did have a few, but did not ask), that is more significant than a tiny discount, less than 3% the camera pricetag. I did not bite. While I may someday buy a 5D mk III, my current battery grip E-6 (which fits the 5D2) will not fit the 5D3; the cost of a new BG-E11 adds 10% to the cost of a 5D3 body. (For me, the grip is a must-have accessory.)
I spoke with an Epson rep regarding special pricing on the 3880 printer. He said the price is $1230, but as an Epson rep, he would take off $80 because he can. With a $250 rebate, the final price is $900. A good price, but is no better than what anyone can order from B&H any day of the week.
In the end, I purchased nothing today. (But I might yet return and trade in an old Gitzo ball head for a new fluid head.)
In 2008, Vince Laforet shocked the film-making world with a short film called “Reverie” (http://vimeo.com/7151244). He shot this in just two days using a borrowed Canon EOS 5D mk II (borrowed from Canon) before the camera was released.
Since then, the 5D mk II has become a serious tool for film-makers, particularly because it is much smaller than existing cameras (those specifically designed for cinematography) … and also because the cost is a small fraction of those cinematography cameras.
Recently, Canon announced a successor for 2012, the EOS 5D mk III.
The overwhelming success of the 5D mk II for video purposes was somewhat surprising to everyone, including Canon and Nikon. Just a couple months prior to introduction of the 5Dm2, Nikon had introduced the first DSLR that supported 720 HD (not 1080). By most accounts, Nikon trailed behind the success of the 5D2, but successfully “caught up” with cameras such as the D7000, D4, and D800, all of which offer excellent 1080 HD video capture. By some measures, the D800 trumps the Canon 5D mk III.
All these cameras are built around CMOS image sensors that are far larger than what you find inside video camcorders. When combined with a system of interchangable lenses, film-makers can create effects and quality not possible with consumer or prosumer video camcorders.
Since the success of the 5D mk II, Canon has been on a mission to create new cameras specifically for cinematography (movies & television). Enter … the new EOS C300, EOS C500, and EOS 1D C (“c” is for cinema). Both the C500 and EOS 1D C can capture at digital resolutions higher than 1080 HD. While the EOS 1D C is an SLR that can shoot still images and video, the C300 and C500 are pure video machines that will capture 12-bit 4:4:4 color, compared to 8-bit 4:2.2 color in any DSLR.
Canon’s new cinematography play is priced well for serious indie film-makers, but not for consumers. So, another interesting camera for 2012, is the new Blackmagic Cinema Camera, which shoots 2.5K video and costs less than $3K.
720 HD = 1280 x 720 (16:9) 1080 HD = 1920 x 1080 (16:9) Panavision Genesis, Sony CineAlta, Canon C300
and DSLRs: Canon 5D mk II, Canon 5D mk III, Canon 1Dx,
Nikon D7000, Nikon D800, Nikon D4
2K = 2048 x 1080 (17:9) Ari Alexa, Silicon Imaging SI-2K, Canon C500 2.5K = 2432 x 1366 (16:9) Blackmagic Cinema camera 4K = 4096 × 2160 (17:9) RED One, Red Scarlet, Canon C500, Canon 1D C
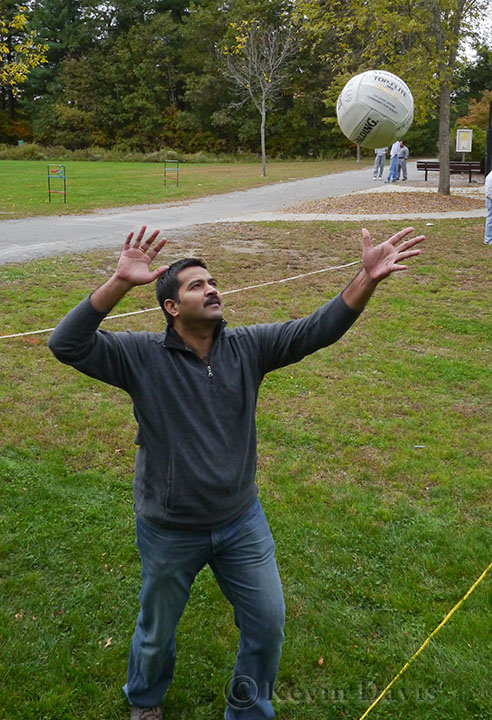
A picnic this week provided opportunity for my fIrst test drive of the Panasonic Lumix G3.
I am very pleased with the ease of use and the image quality. I was super impressed by the face-detection auto-focus and the LCD-touch-screen focus selection.
Shown here is my favorite shot, Balasankar dishing up a nice overhand serve. As you can probably guess, I am holding the G3 over my head for this shot. An articulated/swivel display screen is very helpful for overhead shots and also down-on-the-ground shots. I quickly learned to love this feature on the C-5060 (very few cameras had this feature back in 2004/5) and I absolutely required it for a replacement camera. The 3-inch swivel-touch-display on the G3 is a sweet upgrade.
ISO 800, f\6.3, 1/800 sec, auto white-balance
Shot as JPG (not RAW)
(click the image for a larger view)
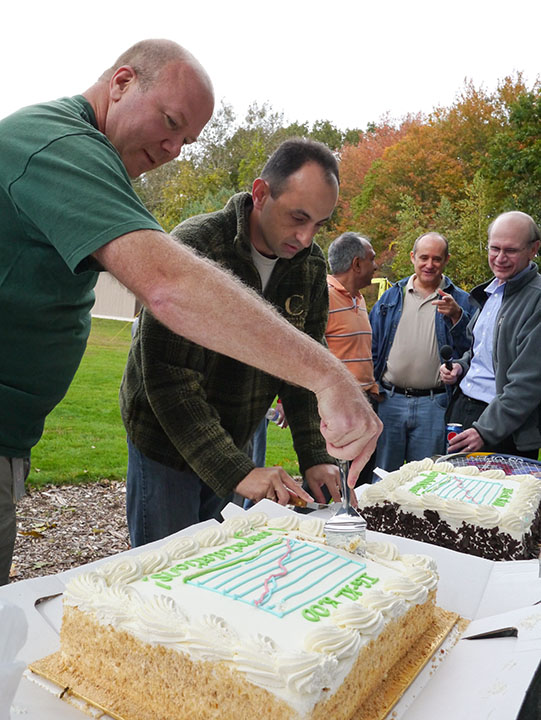
And here are a couple more shots with the same 14mm lens (equivilent to a 28mm on a full-frame DSLR).
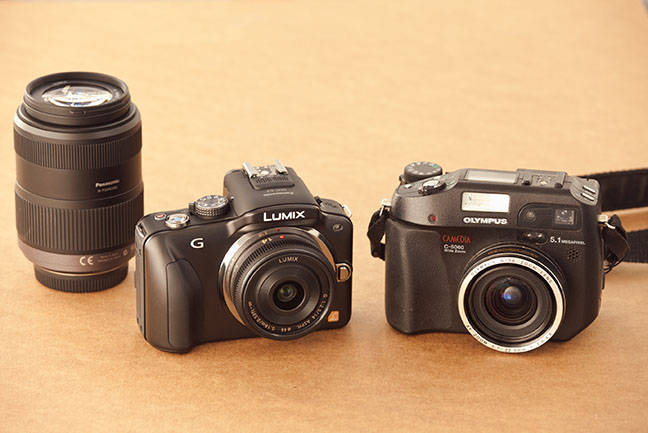
Across two decades, I have owned/used three film cameras, two digital cameras, and one video camcorder. Recently, I acquired a new camera to replace my old digital compact. The new camera is a Panasonic Lumix G3.
The G3 is a relatively compact camera with interchangeable lenses. It is half the size of my Canon DSLR. The G3 is a Micro Four-Thirds camera. Because Four-Thirds and Micro Four-Thirds are both open standards (jointly developed by Olympus and Panasonic), the camera can accept lenses from different vendors, such as Olympus, Panasonic, and Leica.
The biggest reason I replaced the old compact camera is poor low-light performance. The old camera had a maximum ISO of 400 and was prone to a good deal of chromatic noise. The new G3 has a maximum ISO of 6400 and the noise is far less than the old camera at ISO 400.
The ability to record images in low-light is largely a matter of the image sensor. Most small cameras employ small image sensors, which perform poorly in low light. In recent years, some small-to-medium size cameras have been employing larger image sensors. The G3 features a Four-Thirds sensor, which is about six times larger than the sensor in the old C-5060 and is half the size of the image sensor in my DSLR. G3 has three times more pixels than the C5060, while the image sensor size is six times larger. So the individual pixels are larger; and, theoretically, larger pixels can take in more light. But this is theory; the proof is the actual image quality.